Weaponized LF Reader

Intro
Hello and thank you for taking the time to check out my blog!
My projects have almost always leaned towards Red Team operations, but recently I've been focusing heavily on physical pentesting and radio.
I have a few builds currently in the works, but today I decided to tackle something I've wanted to build for a long time: A long-range LF (Low Frequency) badge reader. It’s based on a MaxiProx 5375, but I added some awesome additional capabilities that fit the build nicely.
Goals
Originally, my main goal was simple: LF credential farming and cloning. However, during the build process, I kept finding room for "feature creep." By the end, the goal shifted to building an AIO (All-In-One) badge reader that could also handle SubGHz jamming, capturing, decoding, and repeating along with WiFi and Bluetooth attacks.
The primary use case is Red Team engagements and physical pentests. This device allows for covertly capturing and cloning badge credentials while on the go. Coupled with a badge printer, it’s a powerful combination for gaining unauthorized access.
Aside from the mobile aspect, I also wanted the option to use this as a "drop box" for longer-term capturing and recon.
One final goal that came up at the very end of the build was adding a second ESP32 running Marauder firmware. I wanted this to be controlled by the main ESP32, opening up a much wider range of capabilities for WiFi and Bluetooth testing.
The Plan
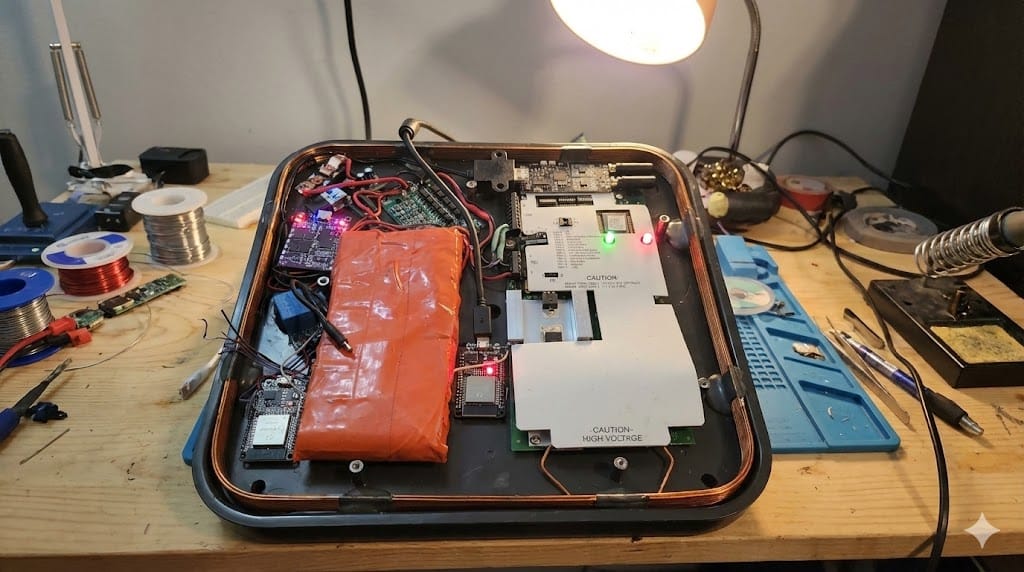
I decided to install an ESP32 inside the shell of the MaxiProx to act as the "brain." Using an ESP32 makes for an easy install and gives me the ability to host the Wiegand data (read by the MaxiProx) on a web server hosted directly on the board. This allows for control via a phone for easy cloning.
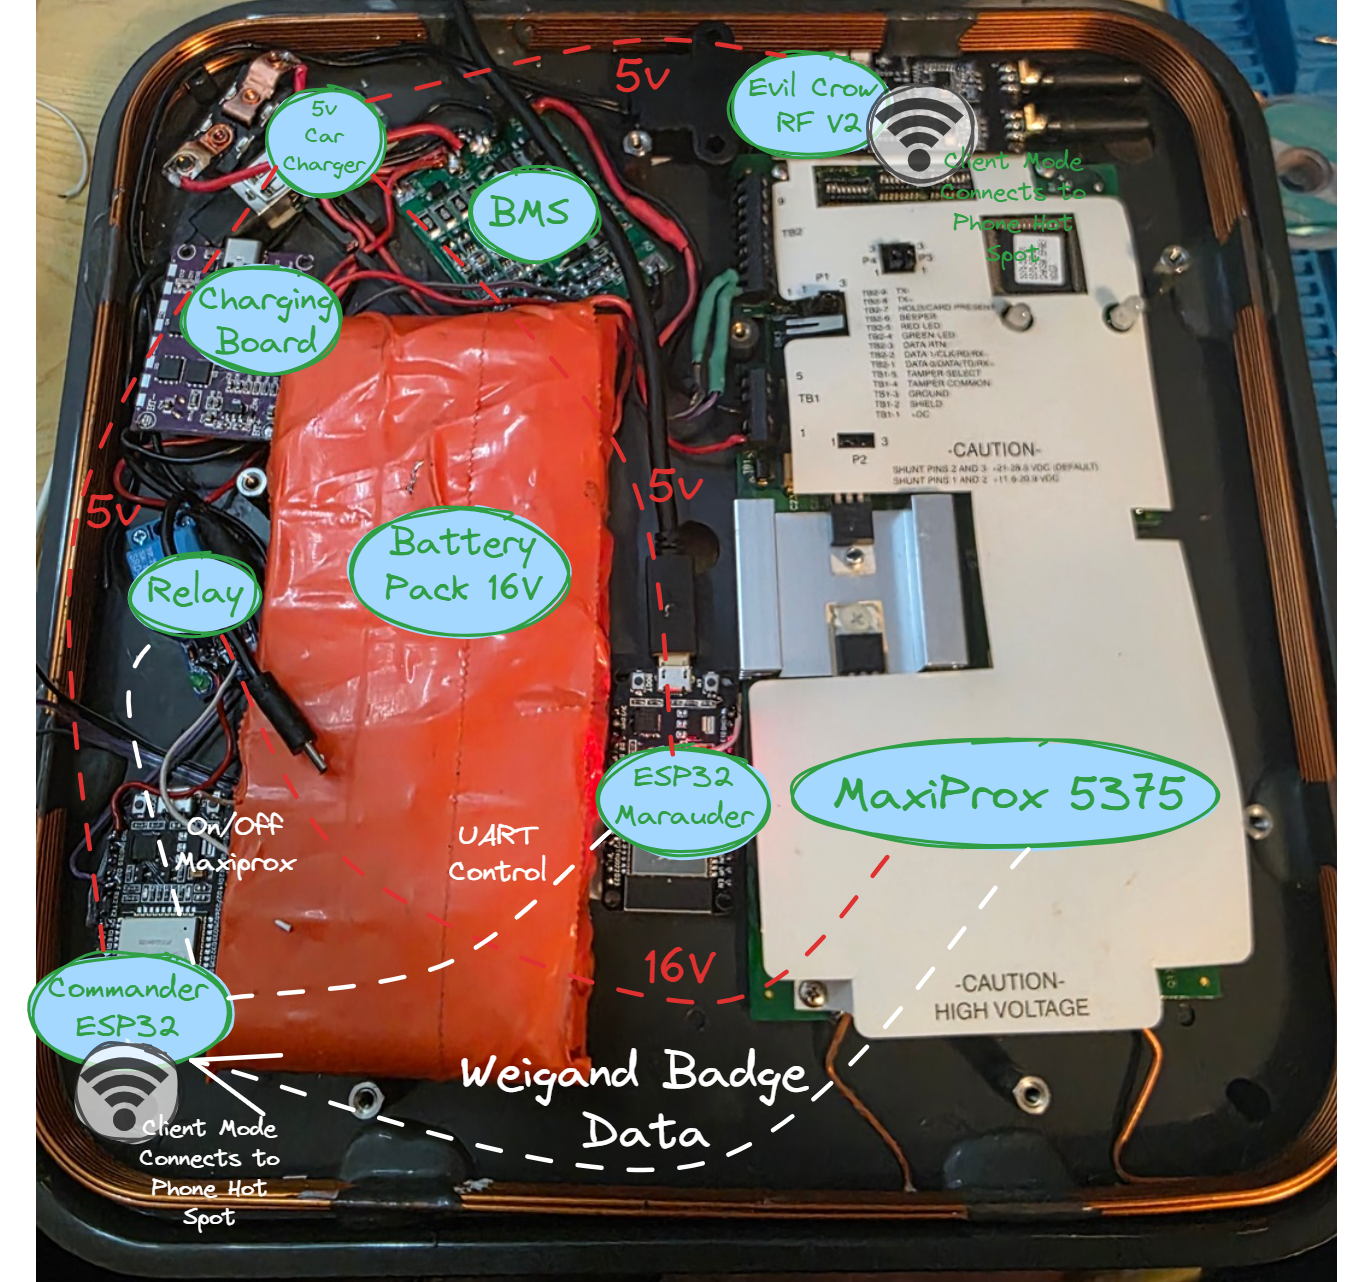
Here is the hardware breakdown:
Power Delivery System (PDS)
- Battery Pack: DIY 4S30A configuration salvaged from DeWalt cells.
- BMS Board (4S40A): To properly charge and balance the cells.
- Charging Board (IP2368): To manage charging the pack.
- 5V One-Channel Relay: Used to cut power to the MaxiProx via the ESP Web UI (this saves battery life for the other components).
- Car Charger Board: Scavenged to convert the 16V battery power down to a 5V rail for the ESPs and Evil Crow.
- Master Switch: To kill power to the whole unit.
Capabilities Hardware
- MaxiProx 5375: The heavy lifter for capturing LF badge credentials.
- Two ESP32s: One running my custom "Commander" firmware, the other running Marauder.
- Evil Crow RF V2: Handling SubGHz signals.
- ProxMark: For cloning captured data to blank cards or fobs.
- Phone: Hosts the hotspot that the Commander ESP and Evil Crow connect to.
Power Delivery
We need to power everything, so let's start there.
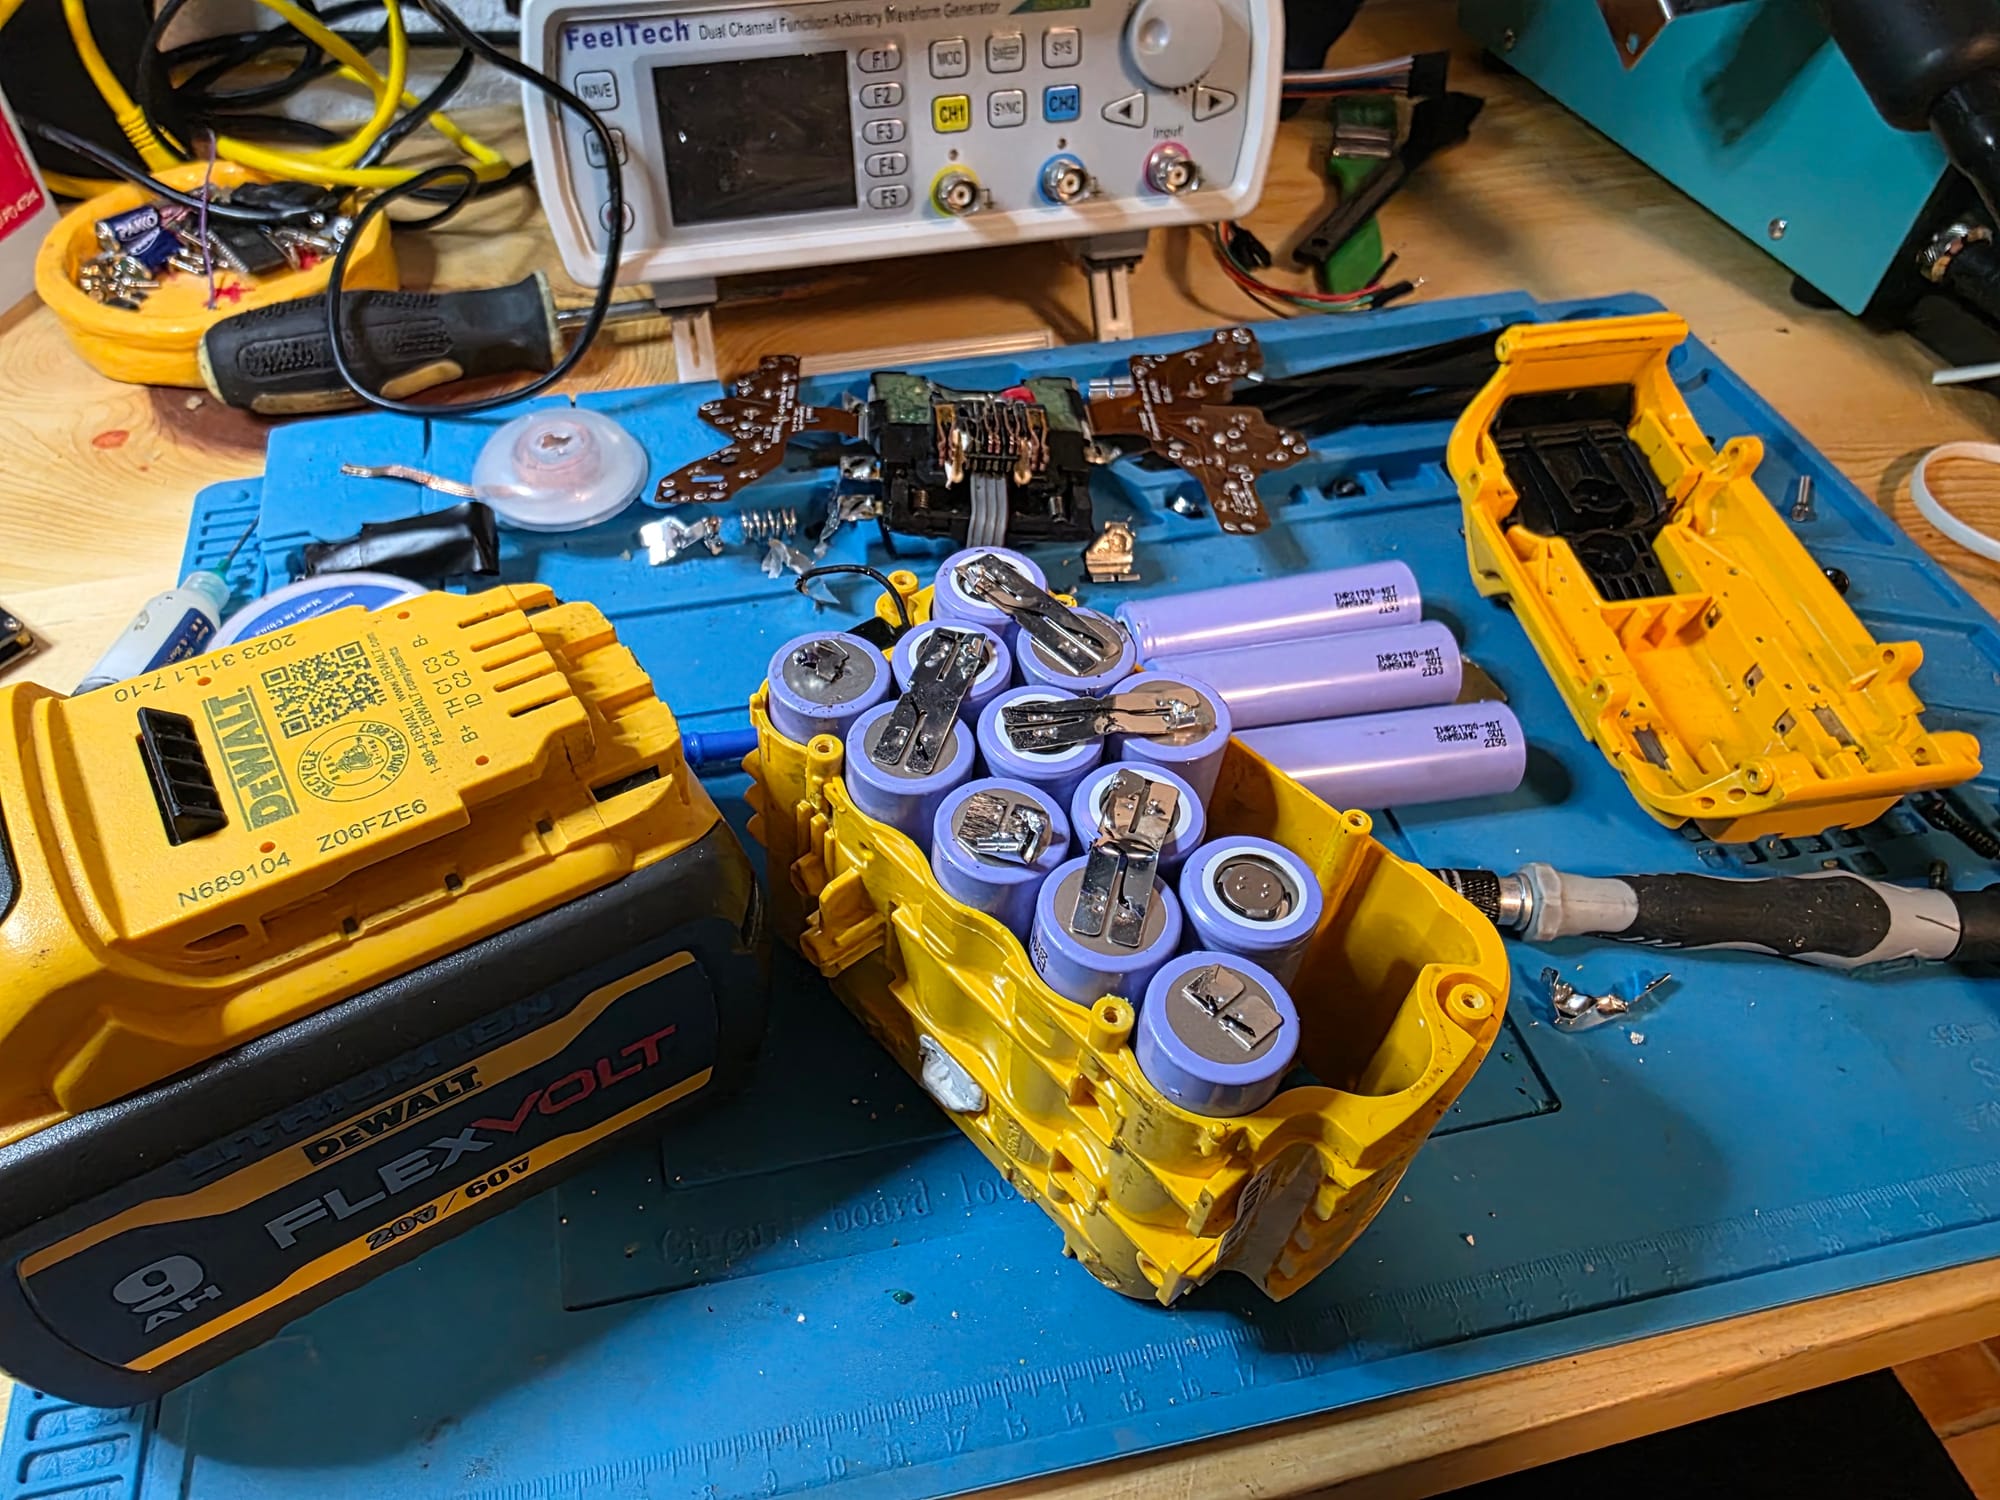
I was originally going to use some "disposable" vape batteries but decided to torment myself and tear apart a couple of dead DeWalt battery packs I was given earlier this year. I couldn't revive the packs, but I salvaged 9 good cells. I combined 8 of them into a 4S30A configuration.
This is definitely overkill for this project, but they were free, so why not?
NOTE: Do not be like me and solder directly to batteries. Please use a proper spot welder.
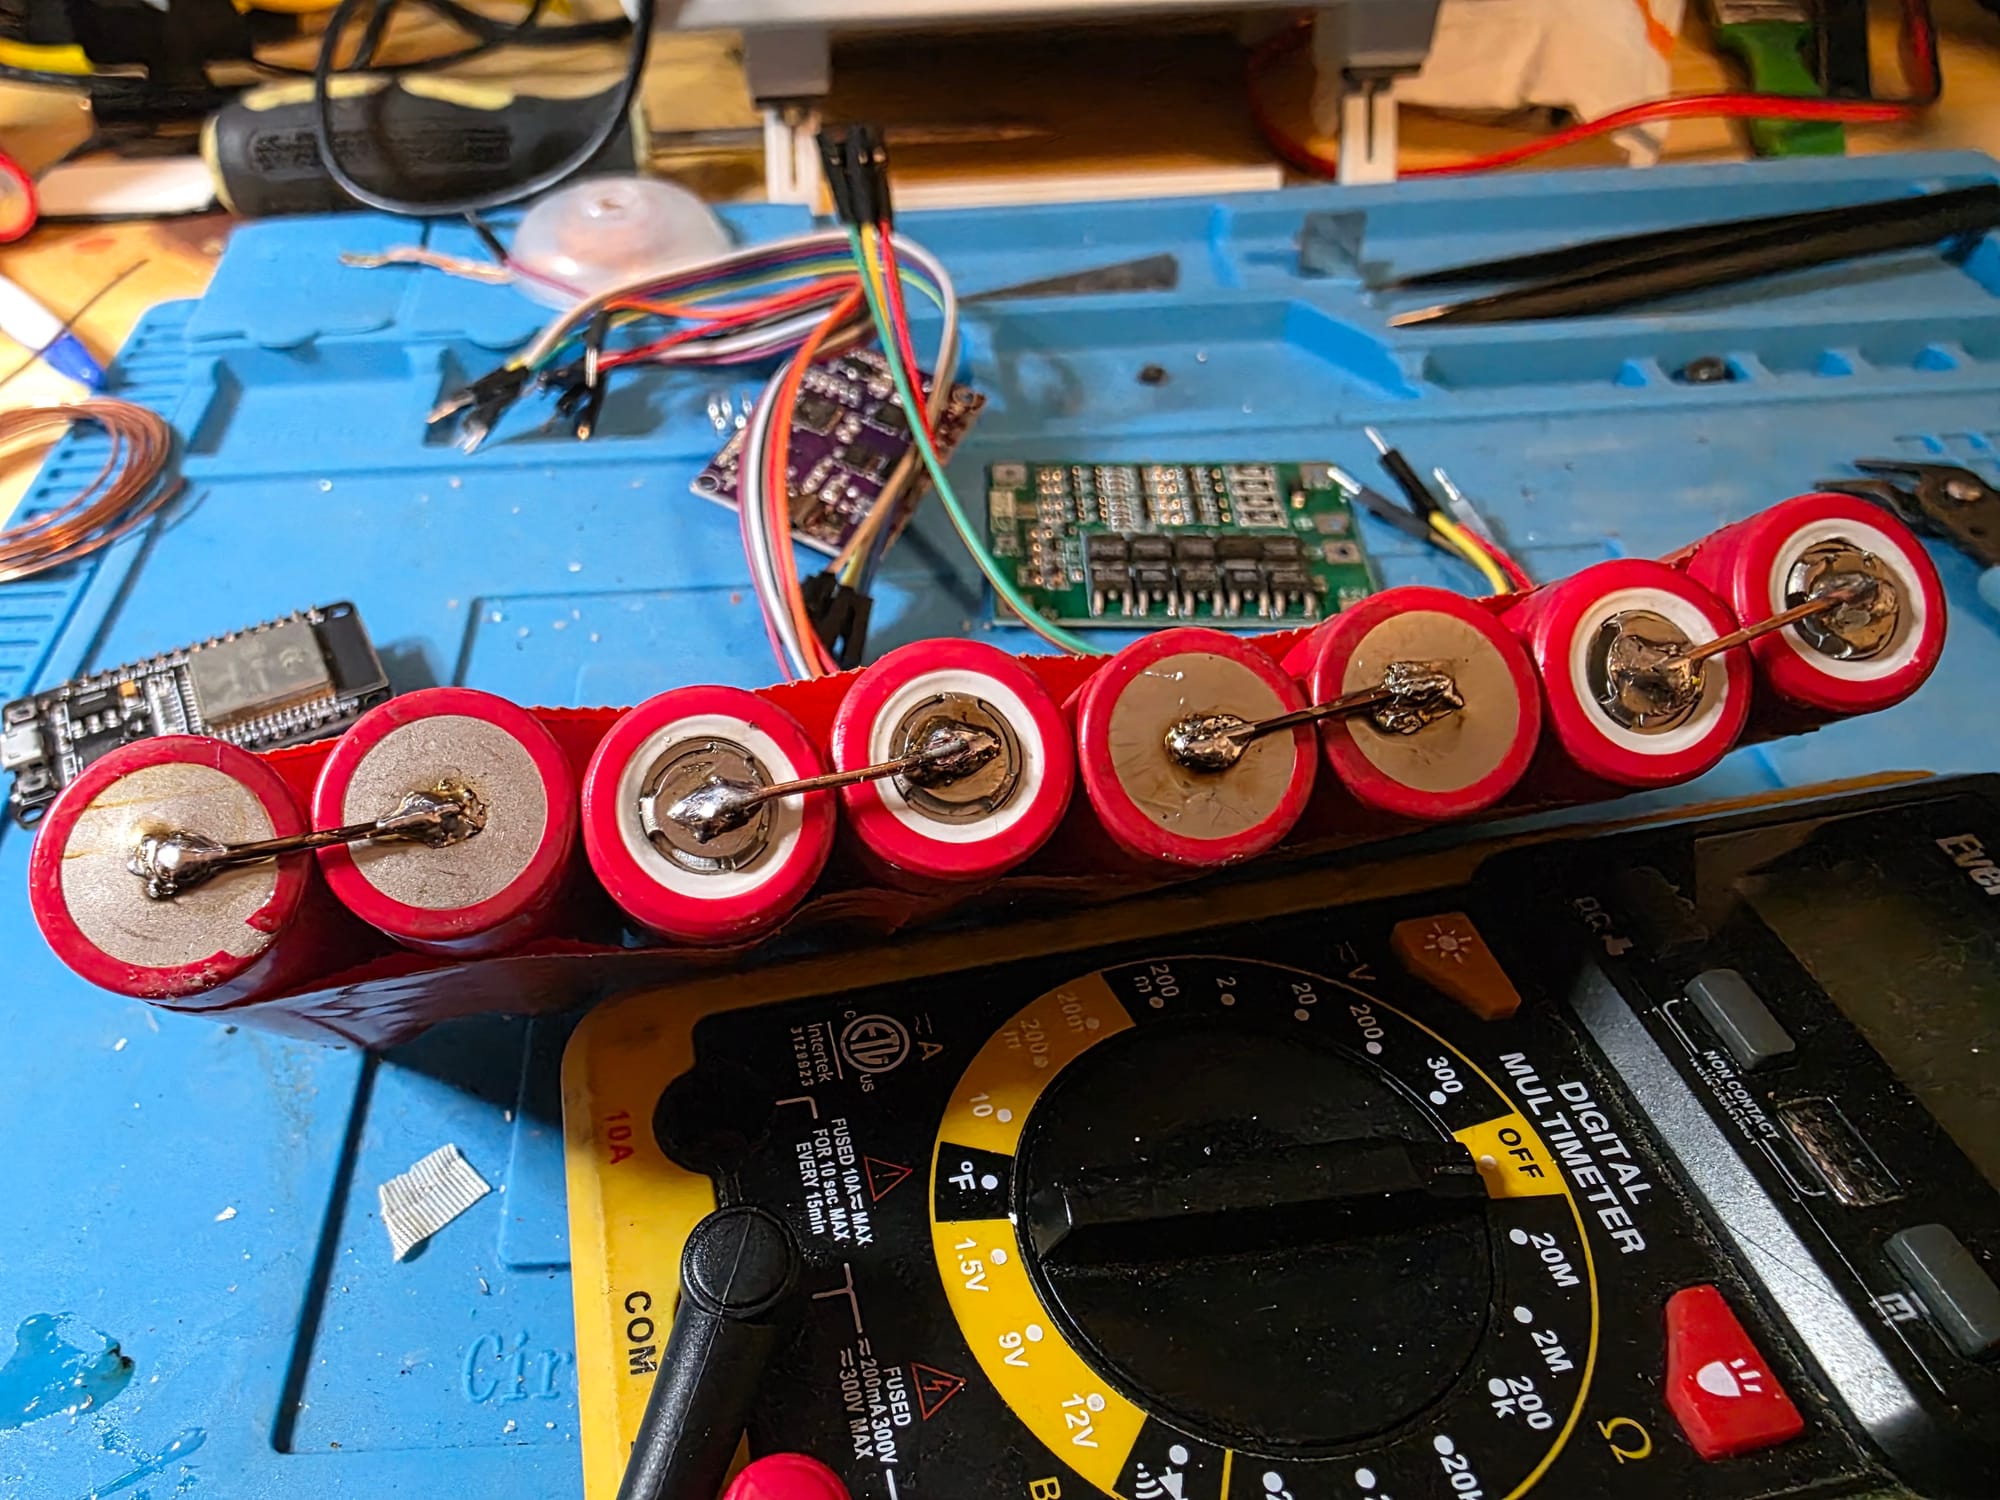


I wired two cells together in parallel for a total of 4 sets, then wired those sets in series to get the voltage I needed. Once that was done, I wired in the BMS board and connected the charging board. Finally, I took the components out of the car charger and added that into the reader to create the 5V rail.
That completed the PDS, so I moved on to the logic.
Smart Features
I went with the ESP32 for a few reasons—mainly because I've worked with them in the past and have a bin full of them waiting to be used. I used Gemini Canvas to write the firmware and VS Code to build and flash it.
Initially, I had Gemini add a scanning feature to the primary ESP32, but it was limited by the other tasks it was juggling. That’s when I decided to add a second unit running Marauder firmware to exclusively handle WiFi/Bluetooth recon and attacks.
At this point, I also planned to add a CC1101 module to the main ESP, but I remembered I had an Evil Crow RF sitting in an unfinished project bin. I decided to throw that in as well. The build ended up being very modular, which made adding these capabilities surprisingly easy.
Once turned on, the "Commander" ESP32 and the Evil Crow connect to a predefined AP running on my phone. This lets me bounce between two web interfaces: one for the Commander and one for the Evil Crow.
The Build Process
The build went about how I expected: adding features, removing features, and burning out 3 total ESP32s (remember to switch the positive wire, not the ground... haha).
Gemini Canvas was great for quick iterations and adding functionality, though there was quite a bit of debugging involved to clean up some weird artifacts. For the most part, though, I was very happy with how quickly this part of the project came together.
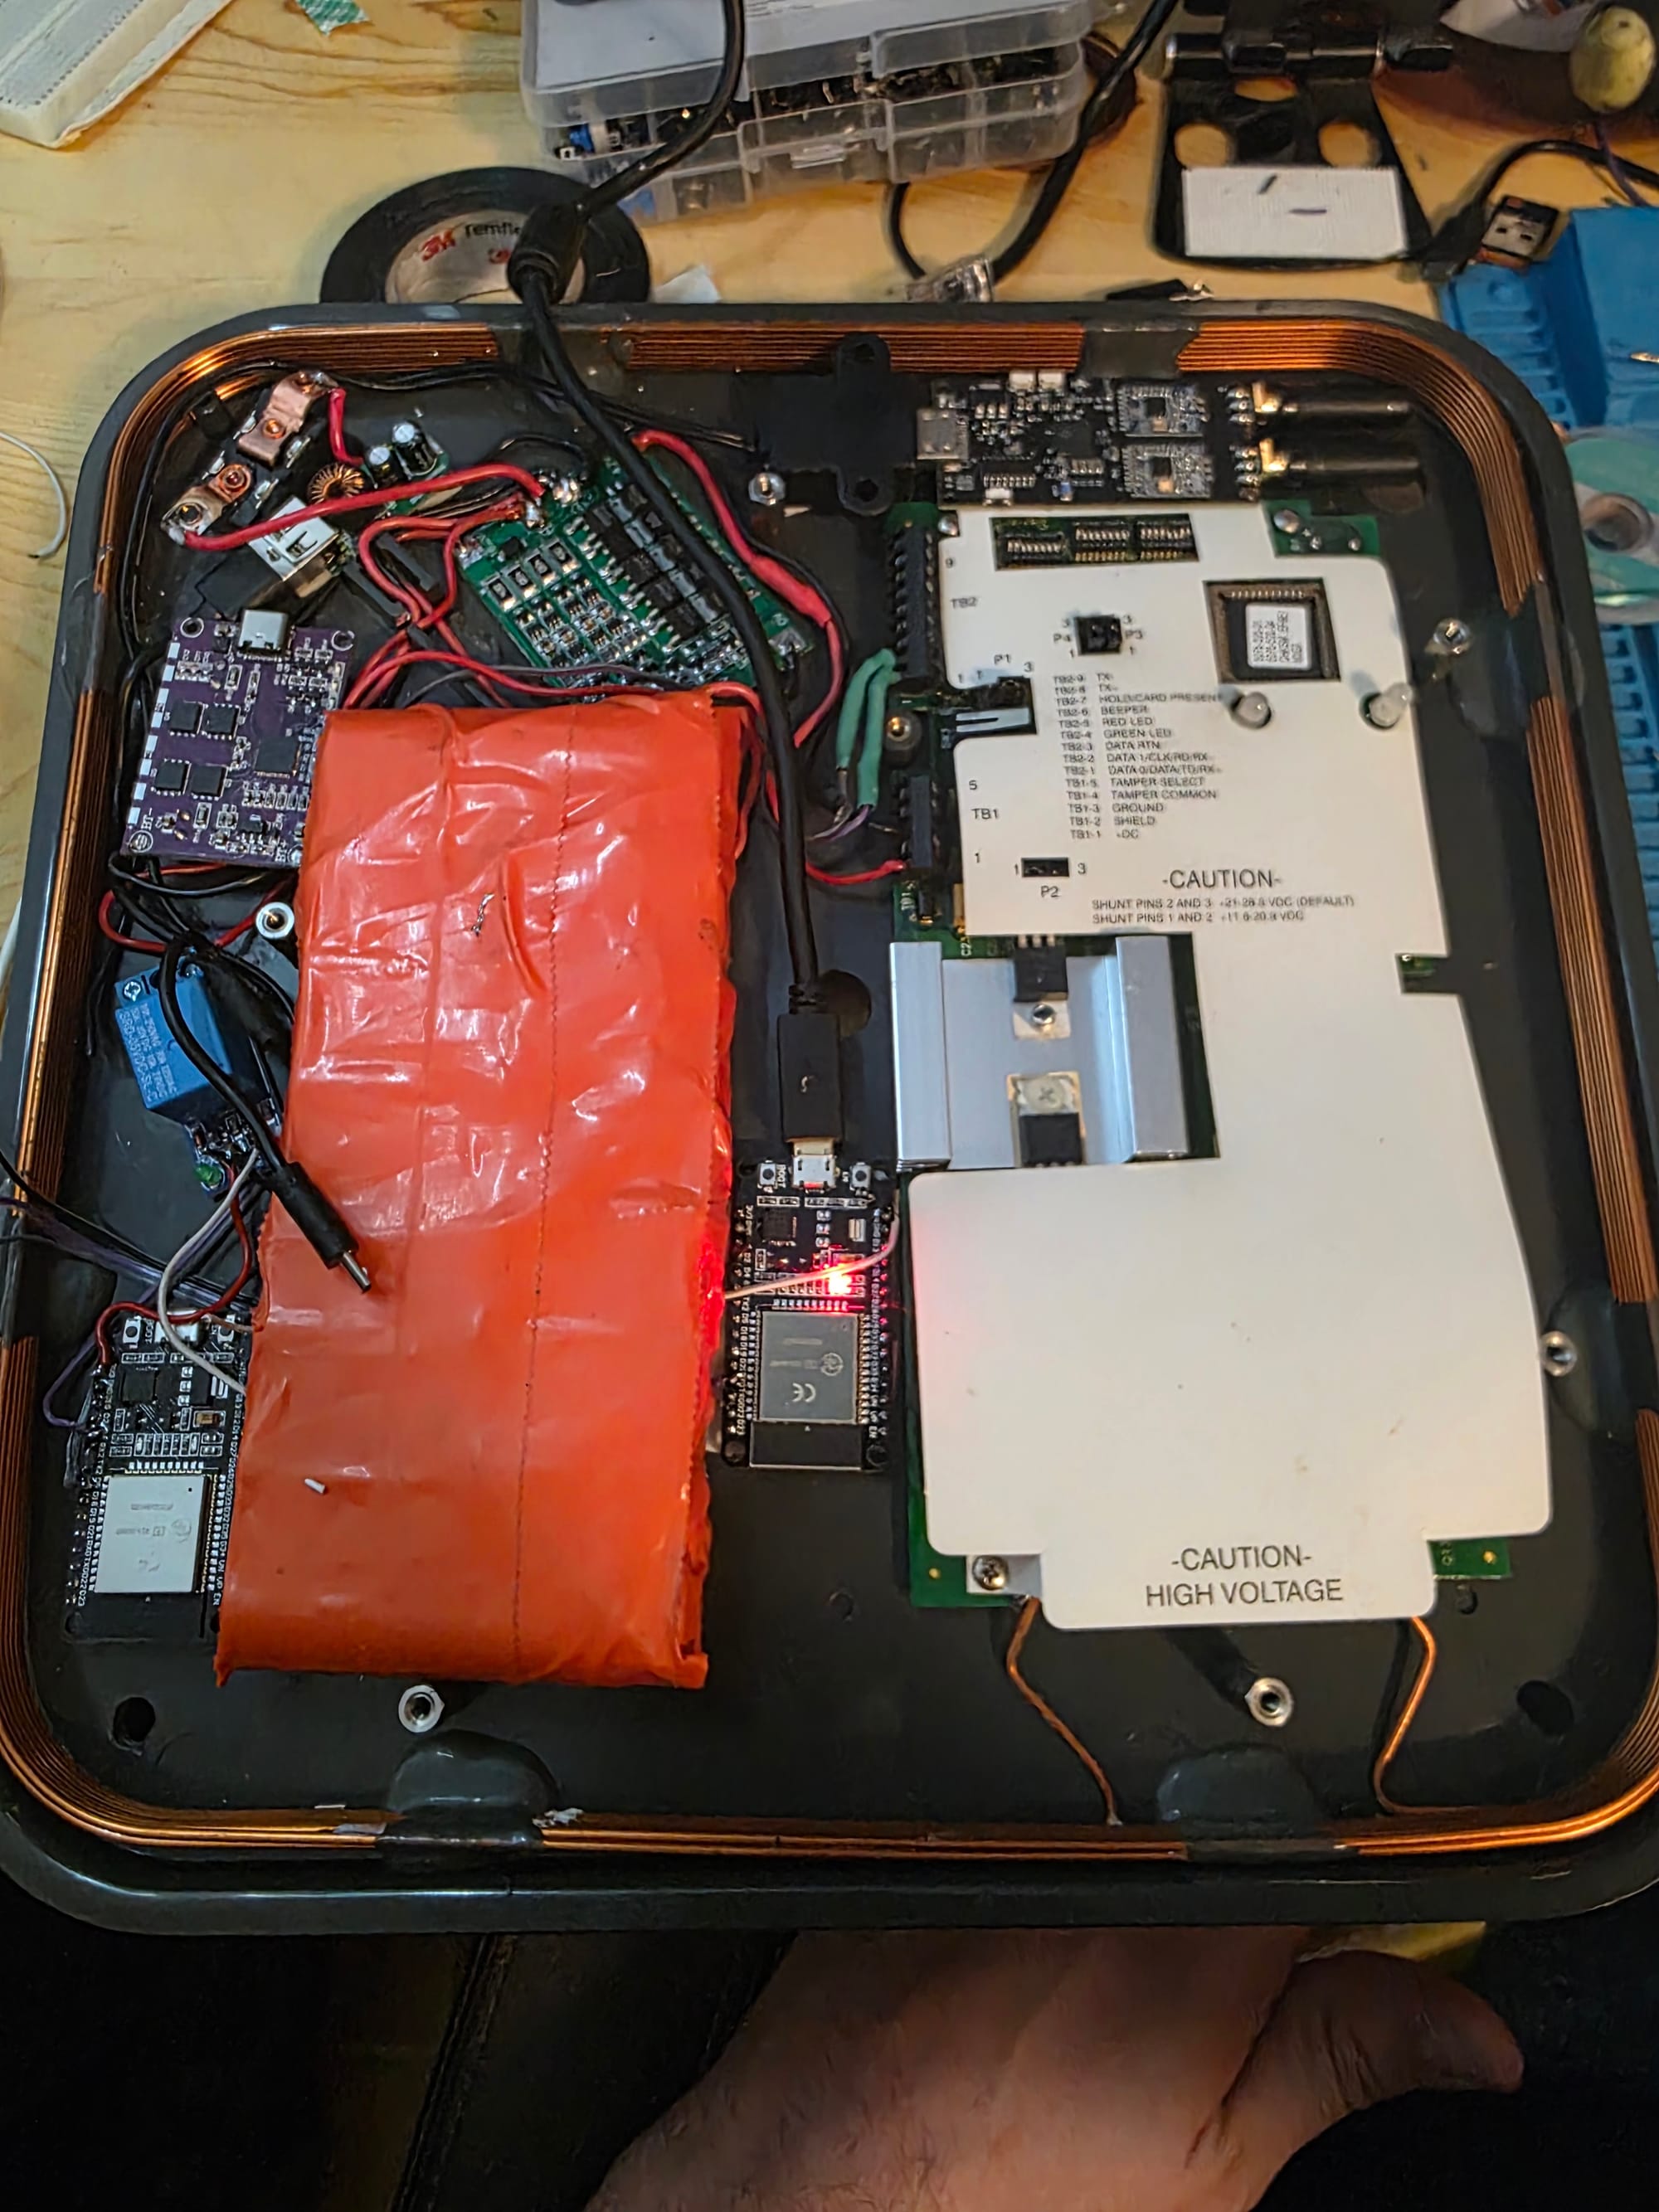
Here are some photos of the evolution of the device:

Capabilities of the Weaponized Reader
Physical Access (Long-Range RFID)
- Component: HID MaxiProx 5375 controlled by Commander ESP32.
- Capability: Passive harvesting of 125kHz HID Prox credentials from extended ranges (20–70 inches).
- Stealth: High-side relay control allows the reader to remain completely powered down and silent until triggered via the Web UI.
Digital Offense (WiFi & Bluetooth)
- Component: Marauder ESP32 (Operator) & Commander ESP32.
- WiFi Recon: Mapping of Access Points, Clients, and hidden networks.
- WiFi Attacks: De-authentication floods, Beacon spamming, and PMKID/EAPOL packet sniffing for password cracking.
- Bluetooth Intelligence: Real-time scanning for device fingerprinting (Manufacturer/Type), occupancy counting, and tracker detection (AirTags/Tiles).
Radio Frequency (Sub-GHz)
- Component: Evil Crow RF V2.
- Capability: Interception and transmission of signals in the 300MHz–900MHz range.
- Attacks: Replay attacks against fixed-code gates/garages, "RollJam" attacks against rolling-code keyfobs, and raw signal jamming.
Command & Control
- Interface: Centralized Web Dashboard hosted on the Commander ESP32.
- Integration: A single "Assault" interface controls the power relay, streams live logs from the Marauder unit via Serial link, and exports captured data to CSV.
Video with early version testing the cloning workflow and range of the reader. x
Here is a quick video showing the web interface from the latest iteration of the firmware. The more I use it the more I change things. Once I get a good thing going, I'll upload to my GitHub.
As far as the Marauder capabilities, I'll just leave a couple of videos here to take a look, as other have covered much better than I ever could.
Snoren's videos are really great for radio stuff. Highly recommend.
Really enjoy these videos as well, especially for getting started.
What's Next?
I have a few ideas on how to improve this build to make it more reliable, but for now, I'm calling it complete.
Eventually, I’d like to reorganize the internals and 3D print proper mounting points instead of relying on double-sided sticky foam—but honestly, it works well enough for now.
I’d also like to target HF credentials as well as NFC and UHF RFID, but those will most likely be separate projects down the road.
Conclusion
I hope you enjoyed checking out my project! I'd appreciate any feedback and welcome any questions you might have. Make sure to check out the repo for the Marauder firmware as well as the Evil Crow.
Hope you have a great day!