Building a Drone Jammer

Intro
Before getting into the project itself, I want to talk about my initial hesitation with sharing these types of projects here on my blog.
It’s not uncommon for my projects to tread a fine line between the fascinating and possibly illegal. I often find myself working on things that, depending on their use could be seen as either tools for education and awareness or as potential tools for illegal activities (my next project definitely falls under this category but more on that in the future).
Take, for example, my collection of 4.9 billion email:password pairs, I've named ComboVault, which I’ve curated and continue to expand with new leaks and combolists over the past 6 months. Or the leaked National Public Database of personal information, including SSNs that I retrieved from the Dark Web and organized into a fully searchable SQL database, complete with a user-friendly Python script for ease of use and queries.
Ethics need to play a central role when working on these types of projects and when I do I usually ask myself, how can this knowledge be shared responsibly and how could it be misused? I know that for me personally I choose these types of projects for the problem solving that goes into it and knowledge gained, not the illegal applications.
My ComboVault is a collection I intend to use when I am able to move into a Pentesting or Red Team position in order to show people and companies the dangers of reusing passwords and the NPD database I built was for learning the process itself of converting that type of leaked data into a searchable database. This was the first time I ever worked with SQL and I was able to accomplish my goal within a day of getting my hands on the data by working with AI tools like ChatGPT.
I trust my own intentions but can't speak for anyone else so these hesitations have often held me back from sharing certain projects at all, including this one. But I believe transparency, if done right can encourage understanding, raise awareness, and spark constructive conversations about privacy and security.
That said, this post won’t be a step-by-step guide on building a jamming device. While the technical details are accessible to those willing to piece them together, my focus here is on the broader implications of this project, its potential applications, and the knowledge gained during the design and build process. After all, context is everything when navigating ethical gray areas.
With all this in mind, I do have to say that jamming of any kind is illegal so please do not use the information found here or in the sources for these purposes.
I do not take responsibility for anything you choose to do with this information as it is for educational purposes only.
Okay, with that out of the way, let's get into the project.
What is my goal here?
I want to learn more about radio frequencies and signals and for this project specifically, jamming signals and antenna design. I also really enjoy learning so I want to have fun doing it!
This project was the born from the curiosity after working with RF on previous projects. Earlier in the year when I was working with my HackRF and RTL-SDR's for things like pulling images from the GOES satellites, NOAA satellites, and performing some Wi-Fi and Car Key Fob pentesting I became almost obsessed with wanting to work with RF.
After I had some time to play around with my HackRF and especially working with my EvilCrowRF-V2 for Roll Jam and Rollback attacks on cars, I wondered about jamming other frequencies and how effective this could be using just the HackRF's built in app or possibly building something myself.
How It Began
I initially thought of using an RPiTX build which I've used before shown a bit in my old portfolio here to perform the jamming but I think I'll eventually revisit building something interesting with RPiTX. I wanted the build to be simple.
Around this time there was a video uploaded on YouTube (which has since been removed) that showed how to build a frequency jamming device using some cheap parts from AliExpress.
In the video he went over the components, how it all worked, and even a demonstration where he showed the jamming of the GPS outdoors using a telescopic antenna.
After some more research, I realized I could build a cheap and effective drone jamming “gun” by focusing on the most used frequencies for drone 2.4GHz (Control signal), 5.8GHz (Video feed), and 1575.42MHz (GPS L1 band). I also wanted the build to be somewhat modular so I could add or remove components and antennas fairly easily to include other frequencies used by different types of drones as different manufacturers will use different frequencies.
Let's Make Some Noise
The whole point of a jammer is noise. It's disrupting the receiving of the target signal by overpowering it with a stronger signal (noise).
I landed on two ideas to generate a noise signal which I needed to test out. The first I saw in the video from above which would be simple to build and generates a triangle wave and another I had seen on a Hackaday post that would allow me to specify the type of signal using some python code and an rp2040 microcontroller.
I ended up building both of these on the same PCB proto board and tested them out. I eventually went with the simpler one as the triangle wave worked much better than the output from the rp2040 version and eventually I am wanting to build more of these for each frequency I plan on jamming.


Noise generating circuits I tested
Quick side note here.
I initially tested both of these using a Pi Pico and old android phone as an oscilloscope. This project is amazing and is what I used for many projects before I found and purchased my current oscilloscope.
I won't be discussing the rest of the components involved in this build so lets move on to the antennas.
Building A Directional Antenna
I also know the frequencies I need jam and now I need to pick an antenna type and build it. I know I need a directional antenna, and I need to be able to design and build one for each frequency. I initially wanted to go with a Yagi-Uda antenna design, and I actually spent a lot of time learning about the radiation properties and how to design them for different frequencies.
Even with how great the Yagi antenna sounded, I eventually stuck with what I already had experience with and also, something that would be easier for me to build, a helical antenna (axial mode) design. I had built multiple helical antennas for my satellite projects in the past using a few different methods, my favorite being the OpenSCAD scaffold found here which was created by dereksgc.
Dereksgc's videos are amazing, and his content has been invaluable for me learning about satellite communications, signals, and antenna design. He has a great helical antenna calculator which has in depth descriptions of each parameter and some other useful information about designing and building these antennas on his YouTube channel among some more great RF content.
Some More Resources
If you want to learn the basics of radio waves and propagation, I recommend you start here with these three short videos. You will not be disappointed!
Antenna Fundamentals 1 Propagation
Antenna Fundamentals 2 Directivity
Antenna Fundamentals 3 Bandwidth
I also want to provide you with the following video that does a great job explaining helical antenna design principals:
Design Tutorial of Helical Antenna (Normal & Axial Modes)
For more information on helical antennas or any other type I also recommend the following website:
For more information regarding antennas in general, here is an amazing course on YouTube:
HackadayU: Introduction to Antenna Basics.
Using the resources above, I came up with the dimensions of the helical antennas after some parameter tuning to get them around the size I wanted as well as with some good amount of gain (theoretical).
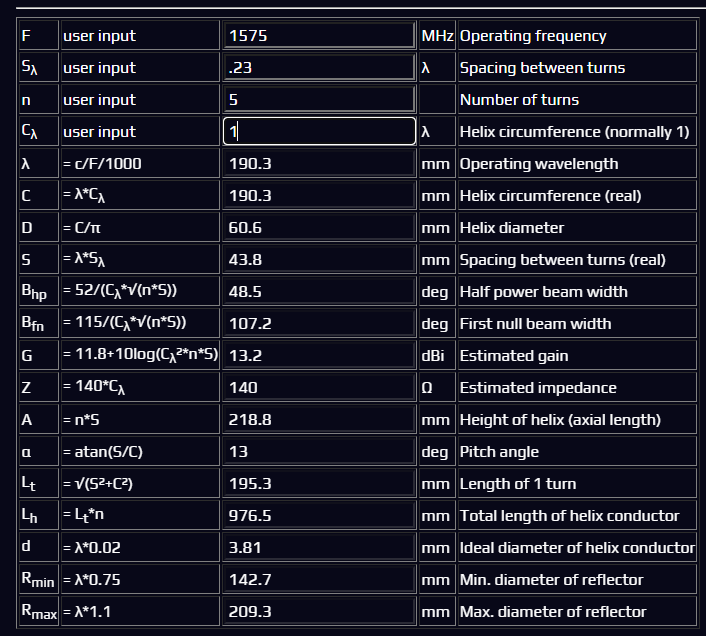
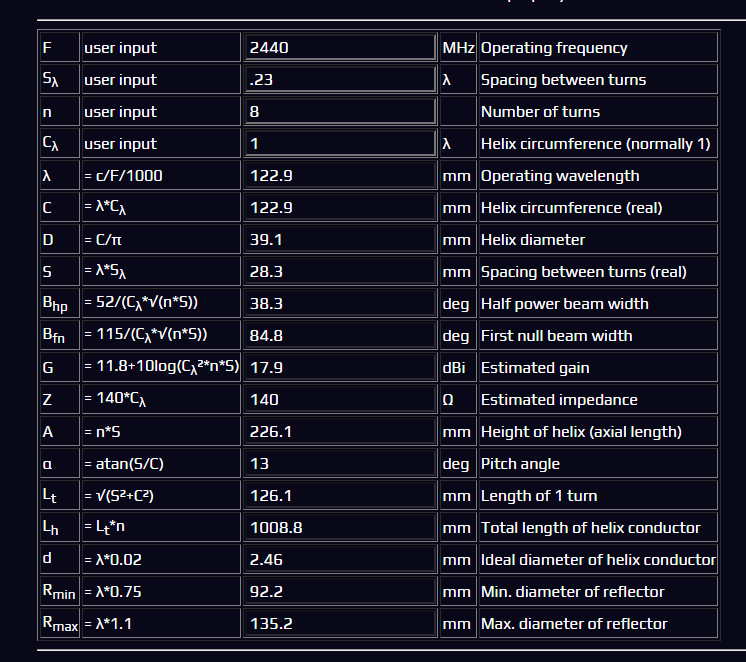
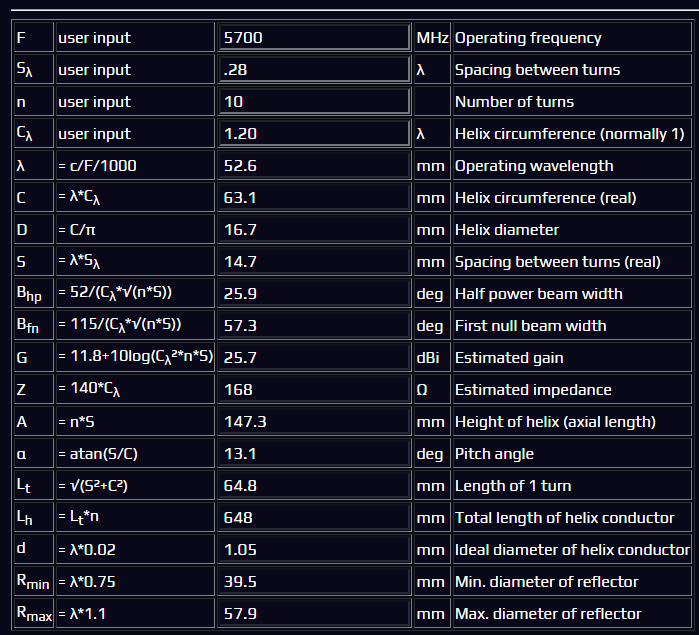
Helical antenna calculator
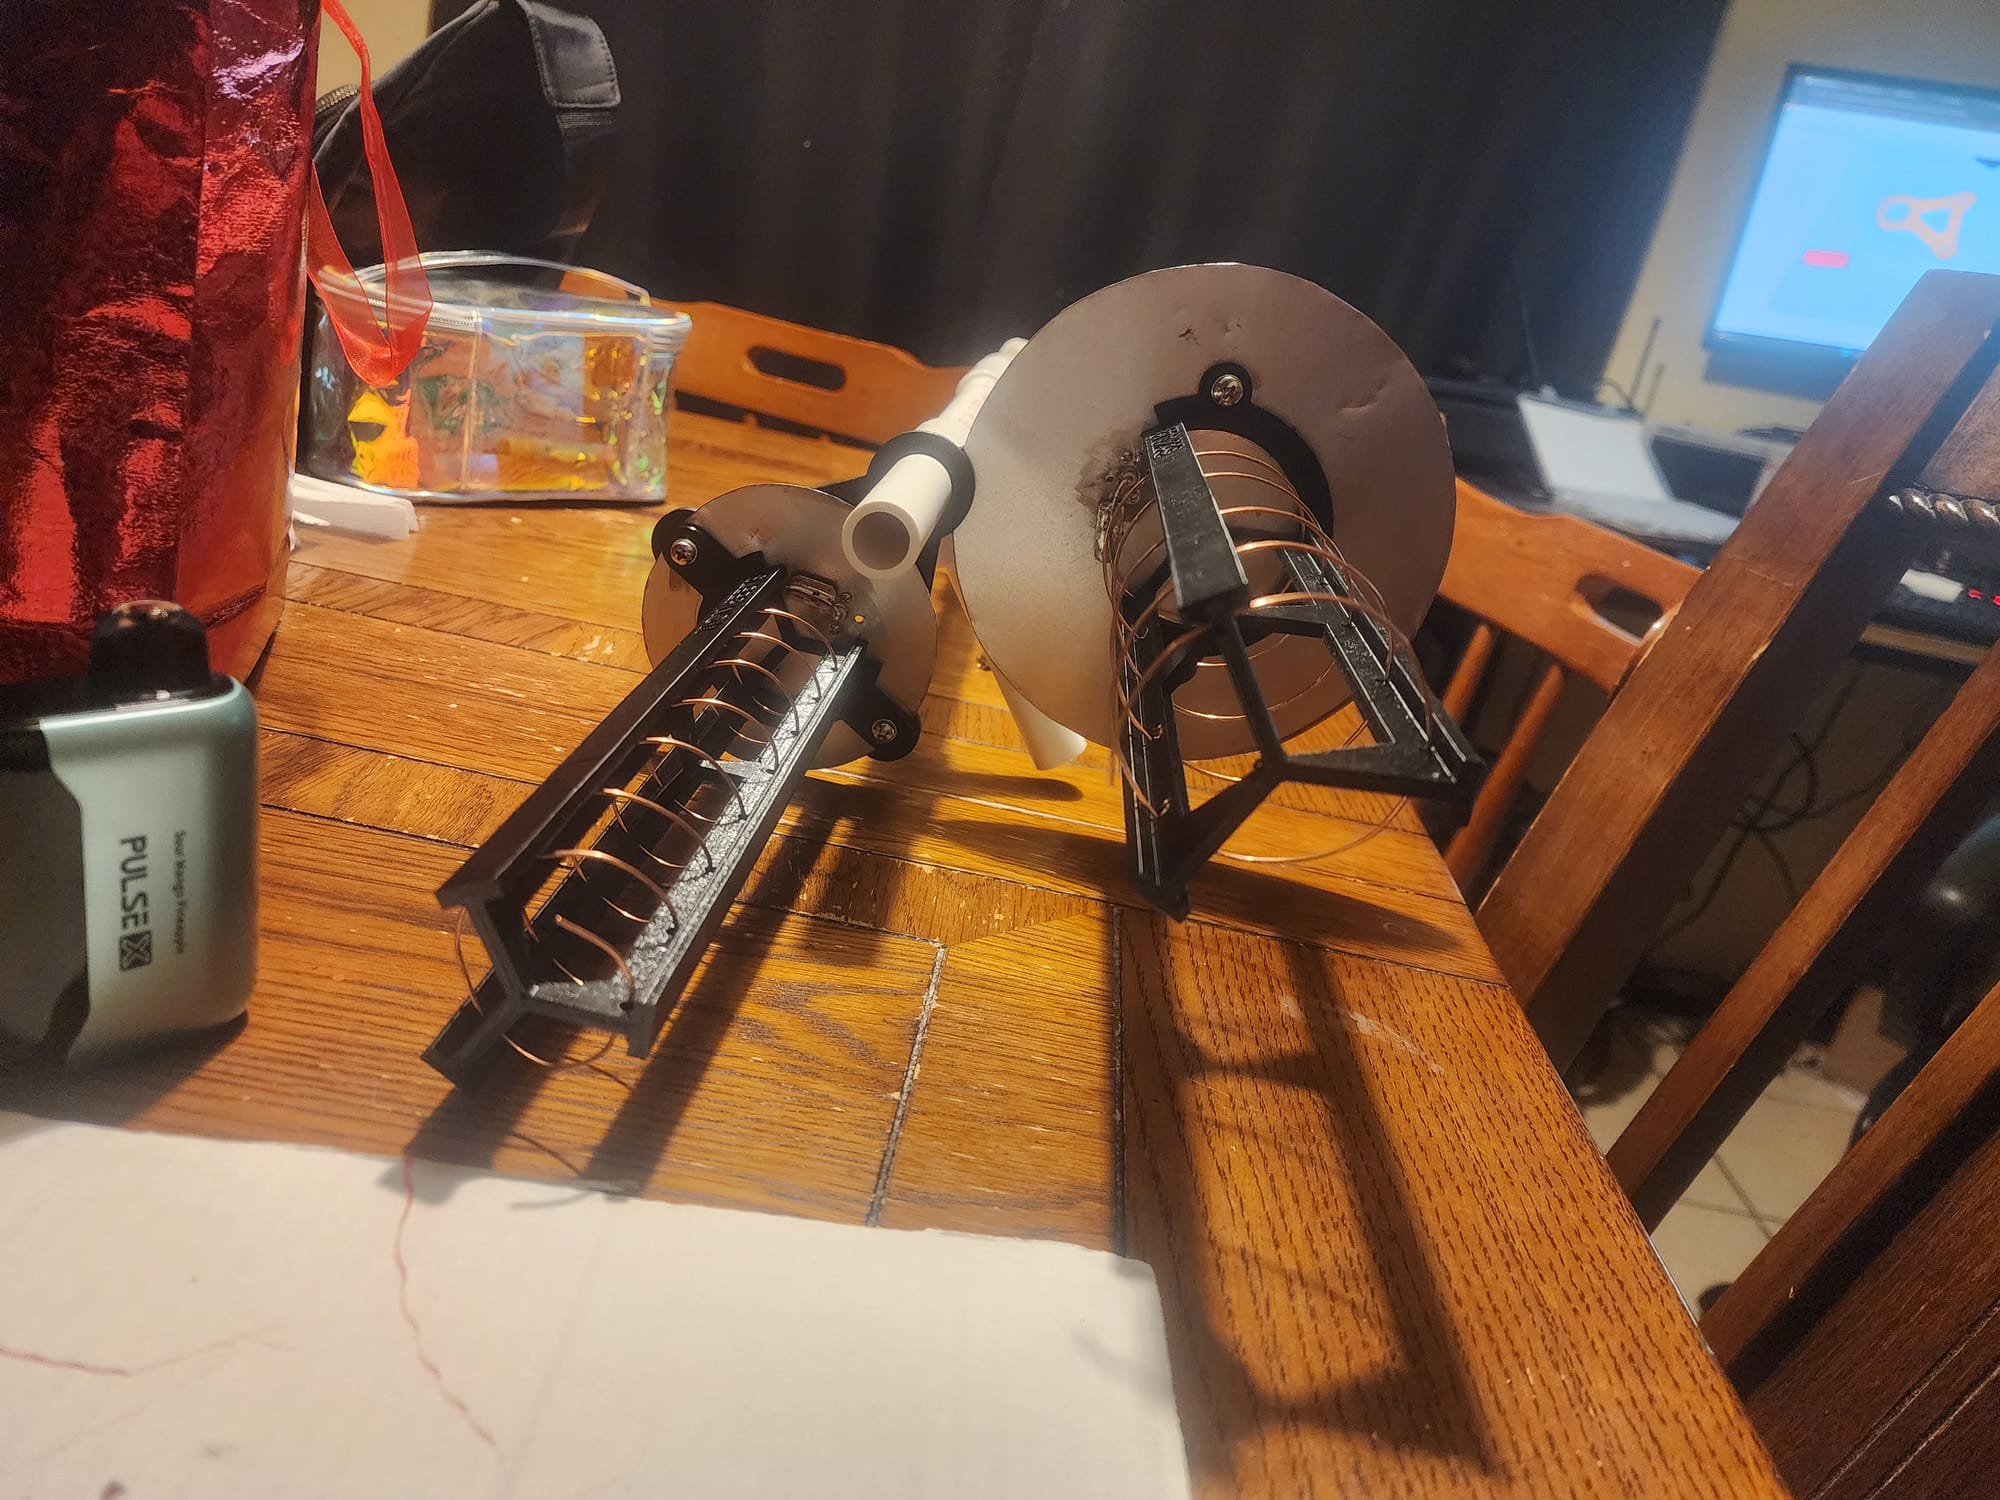
I 3d printed the scaffolding and began putting the antennas together. I really enjoyed this part of the build although it did take the longest to complete.

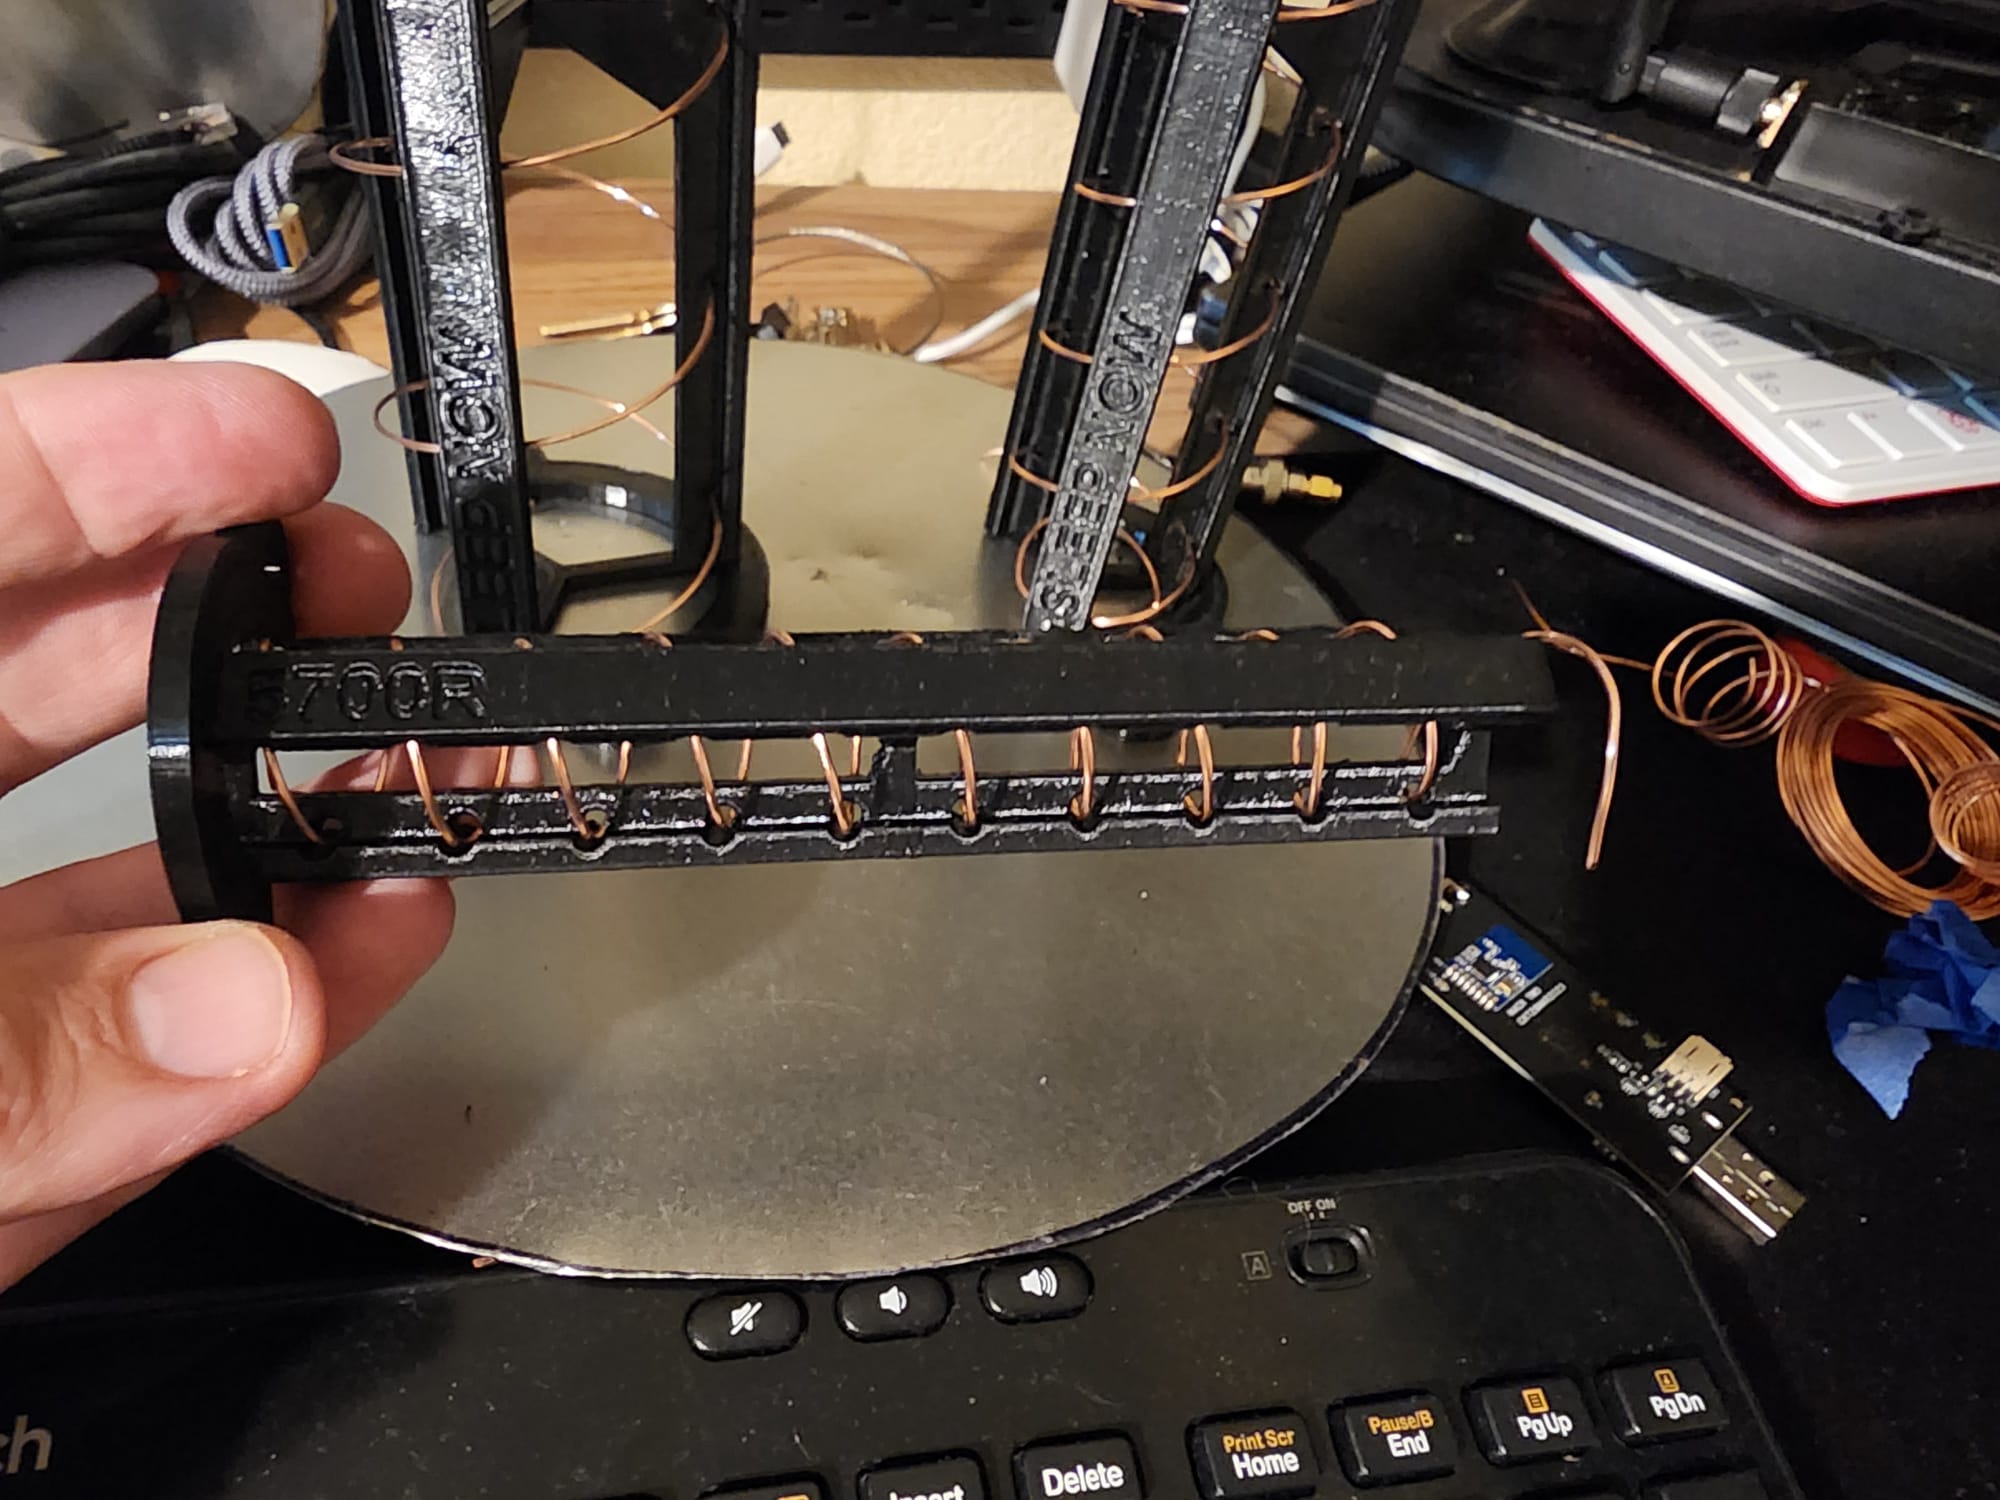
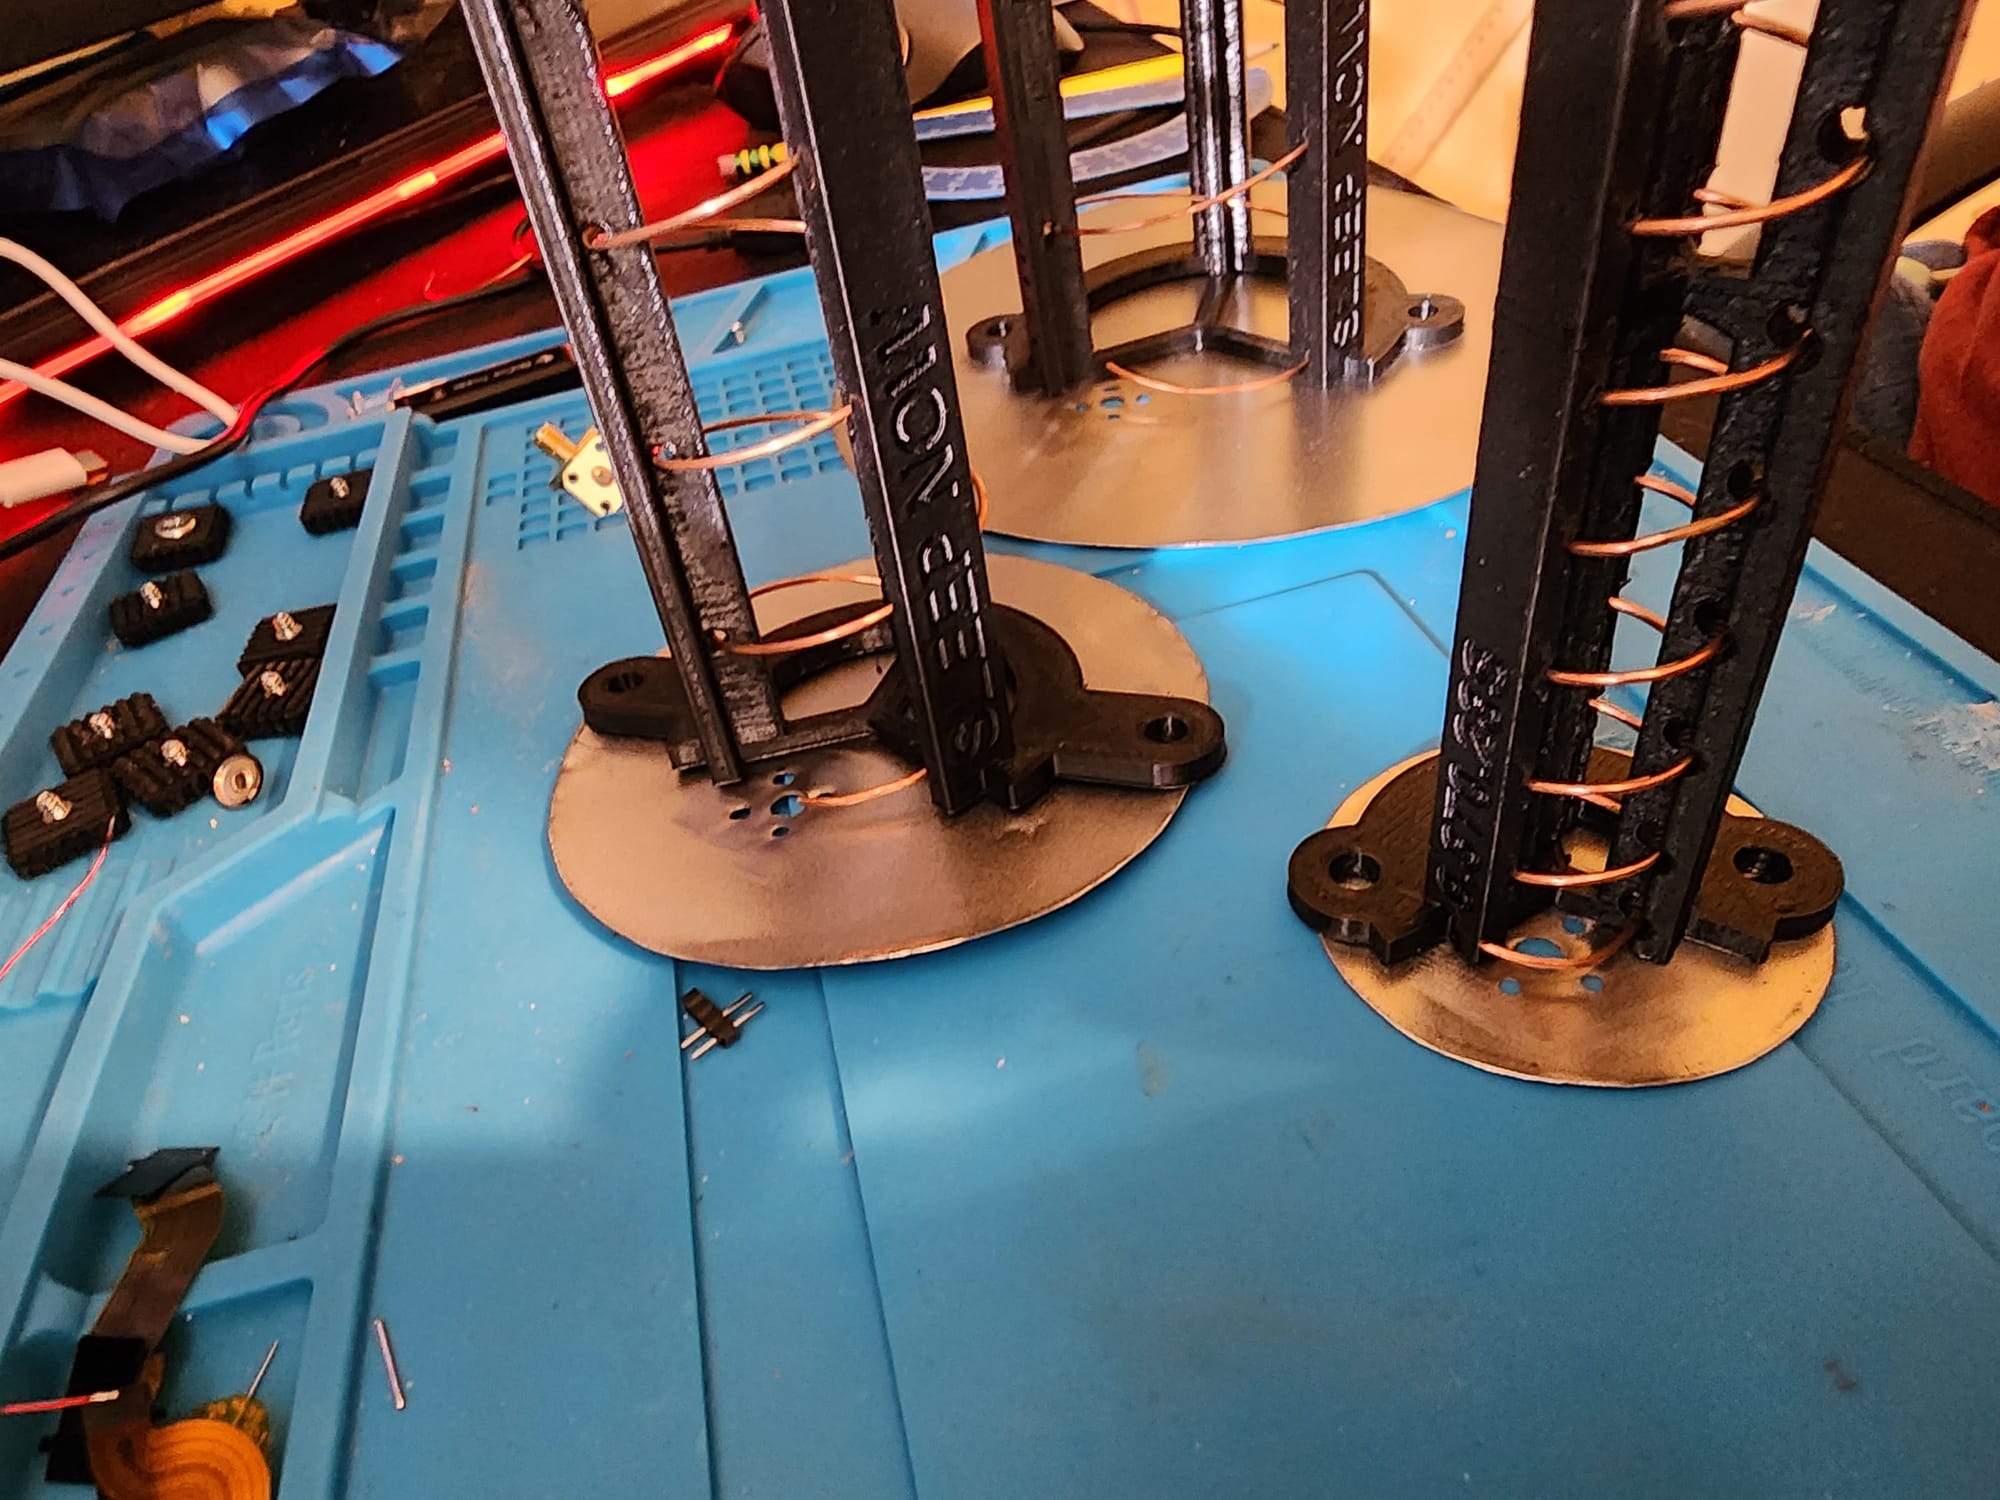
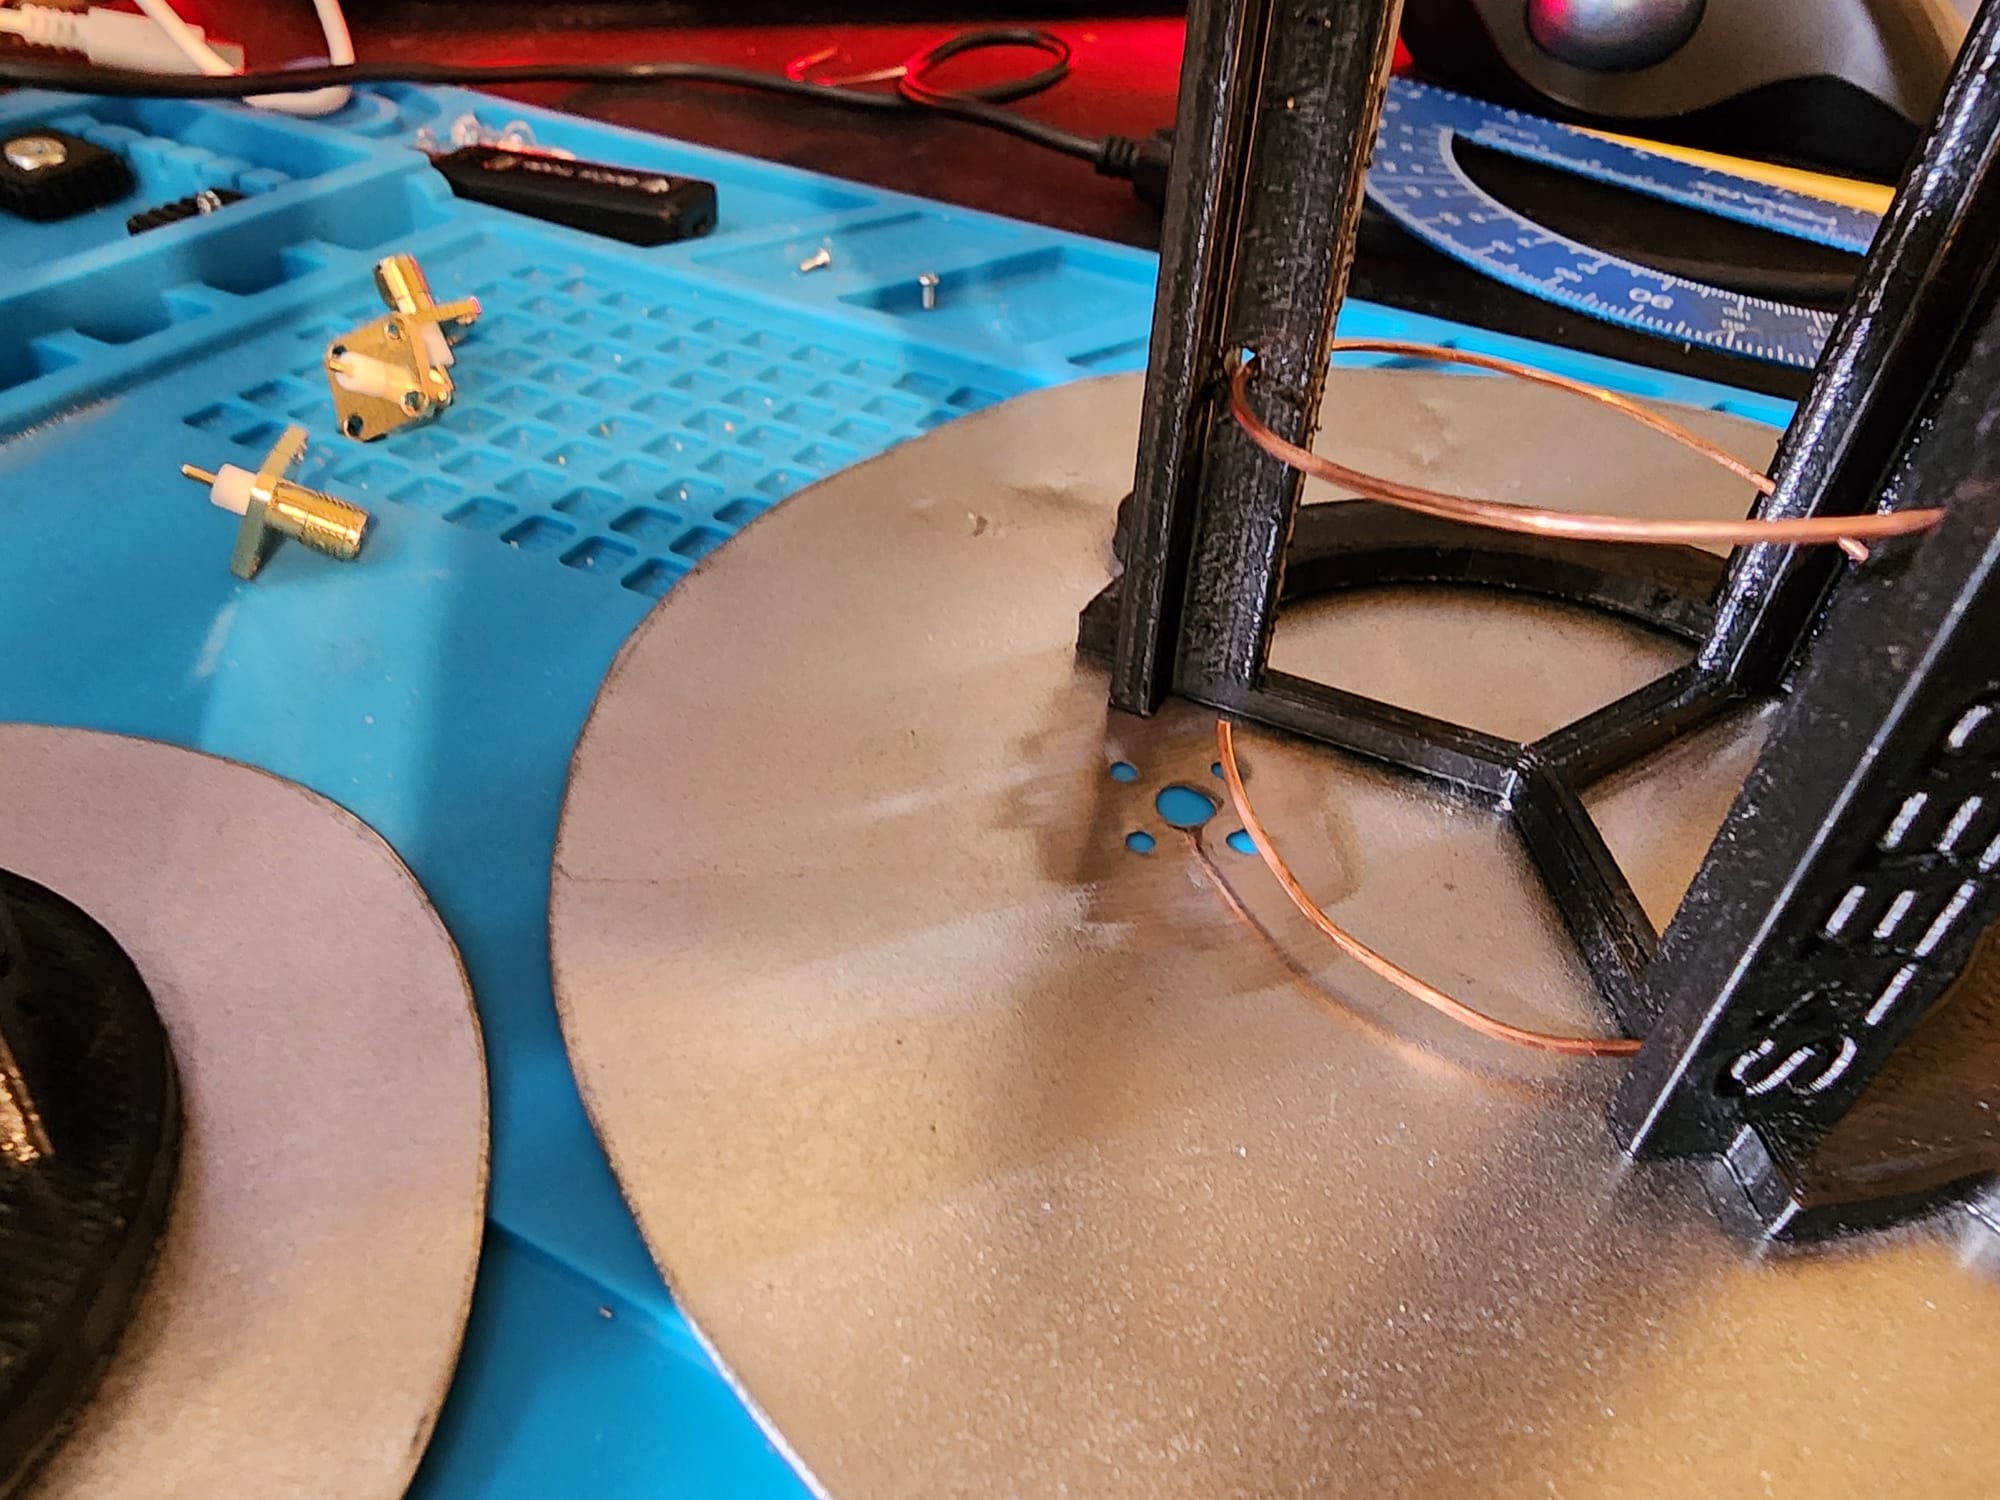
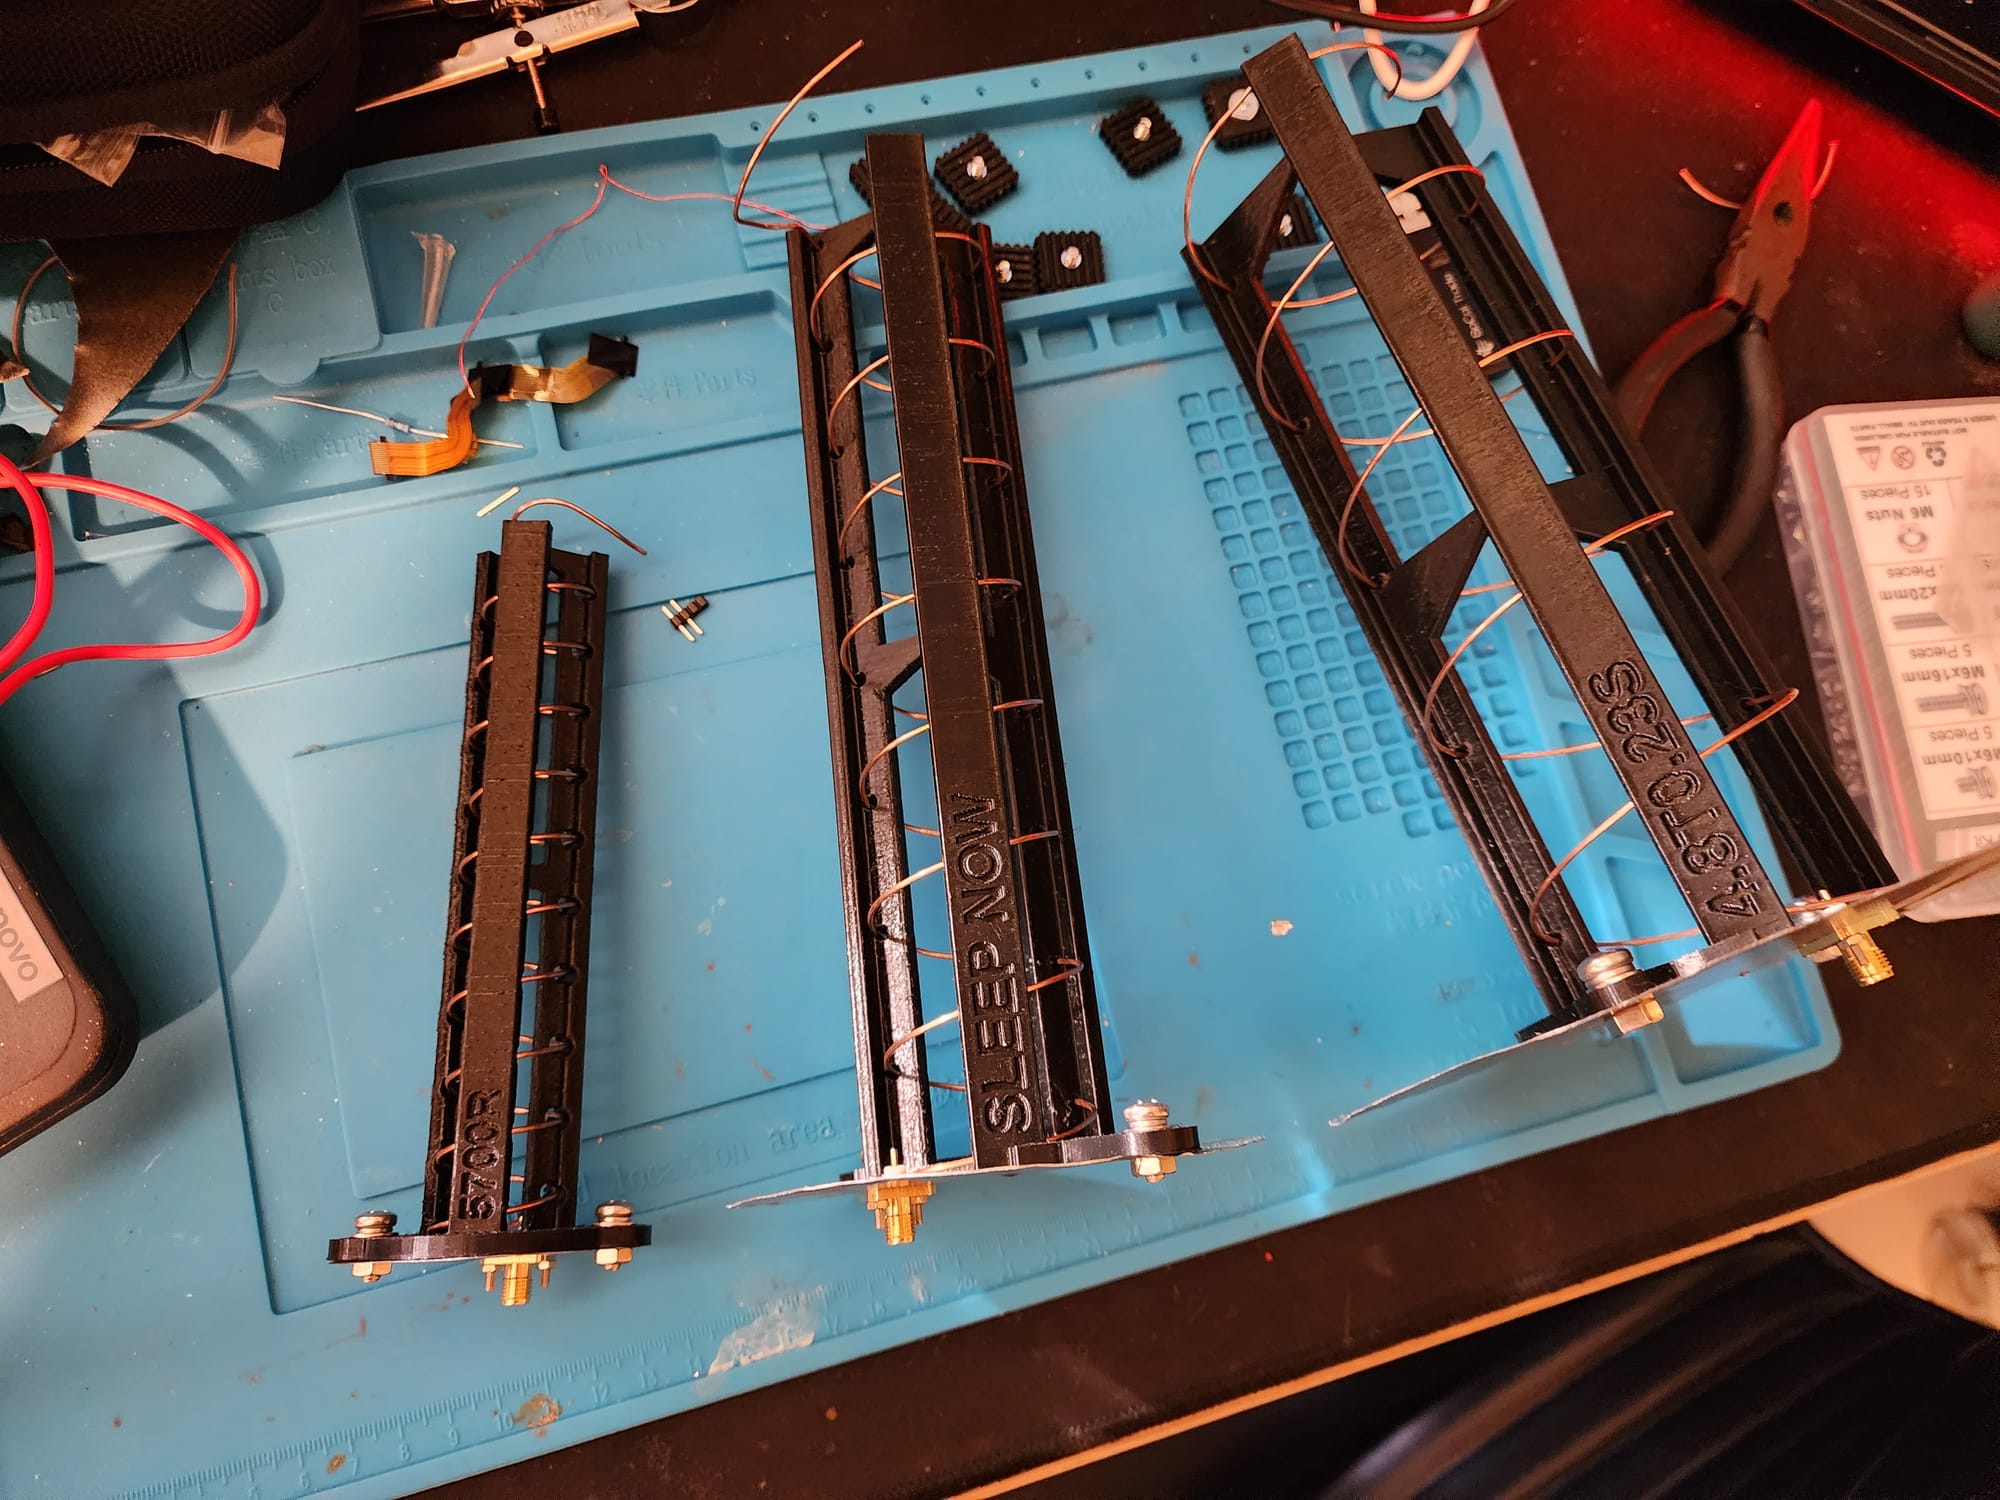

Helical antenna build
Testing The Antennas
Once I completed the GPS L1 antenna, I tested the SWR with my NanoVNA and got some really great results, 1.2 SWR at the target frequency. Unfortunately, I have yet to purchase a Vector Network Analyzer with a higher frequency range due to the cost. I will have to trust the design for the 2.4Ghz and the 5.8GHz antennas for now.
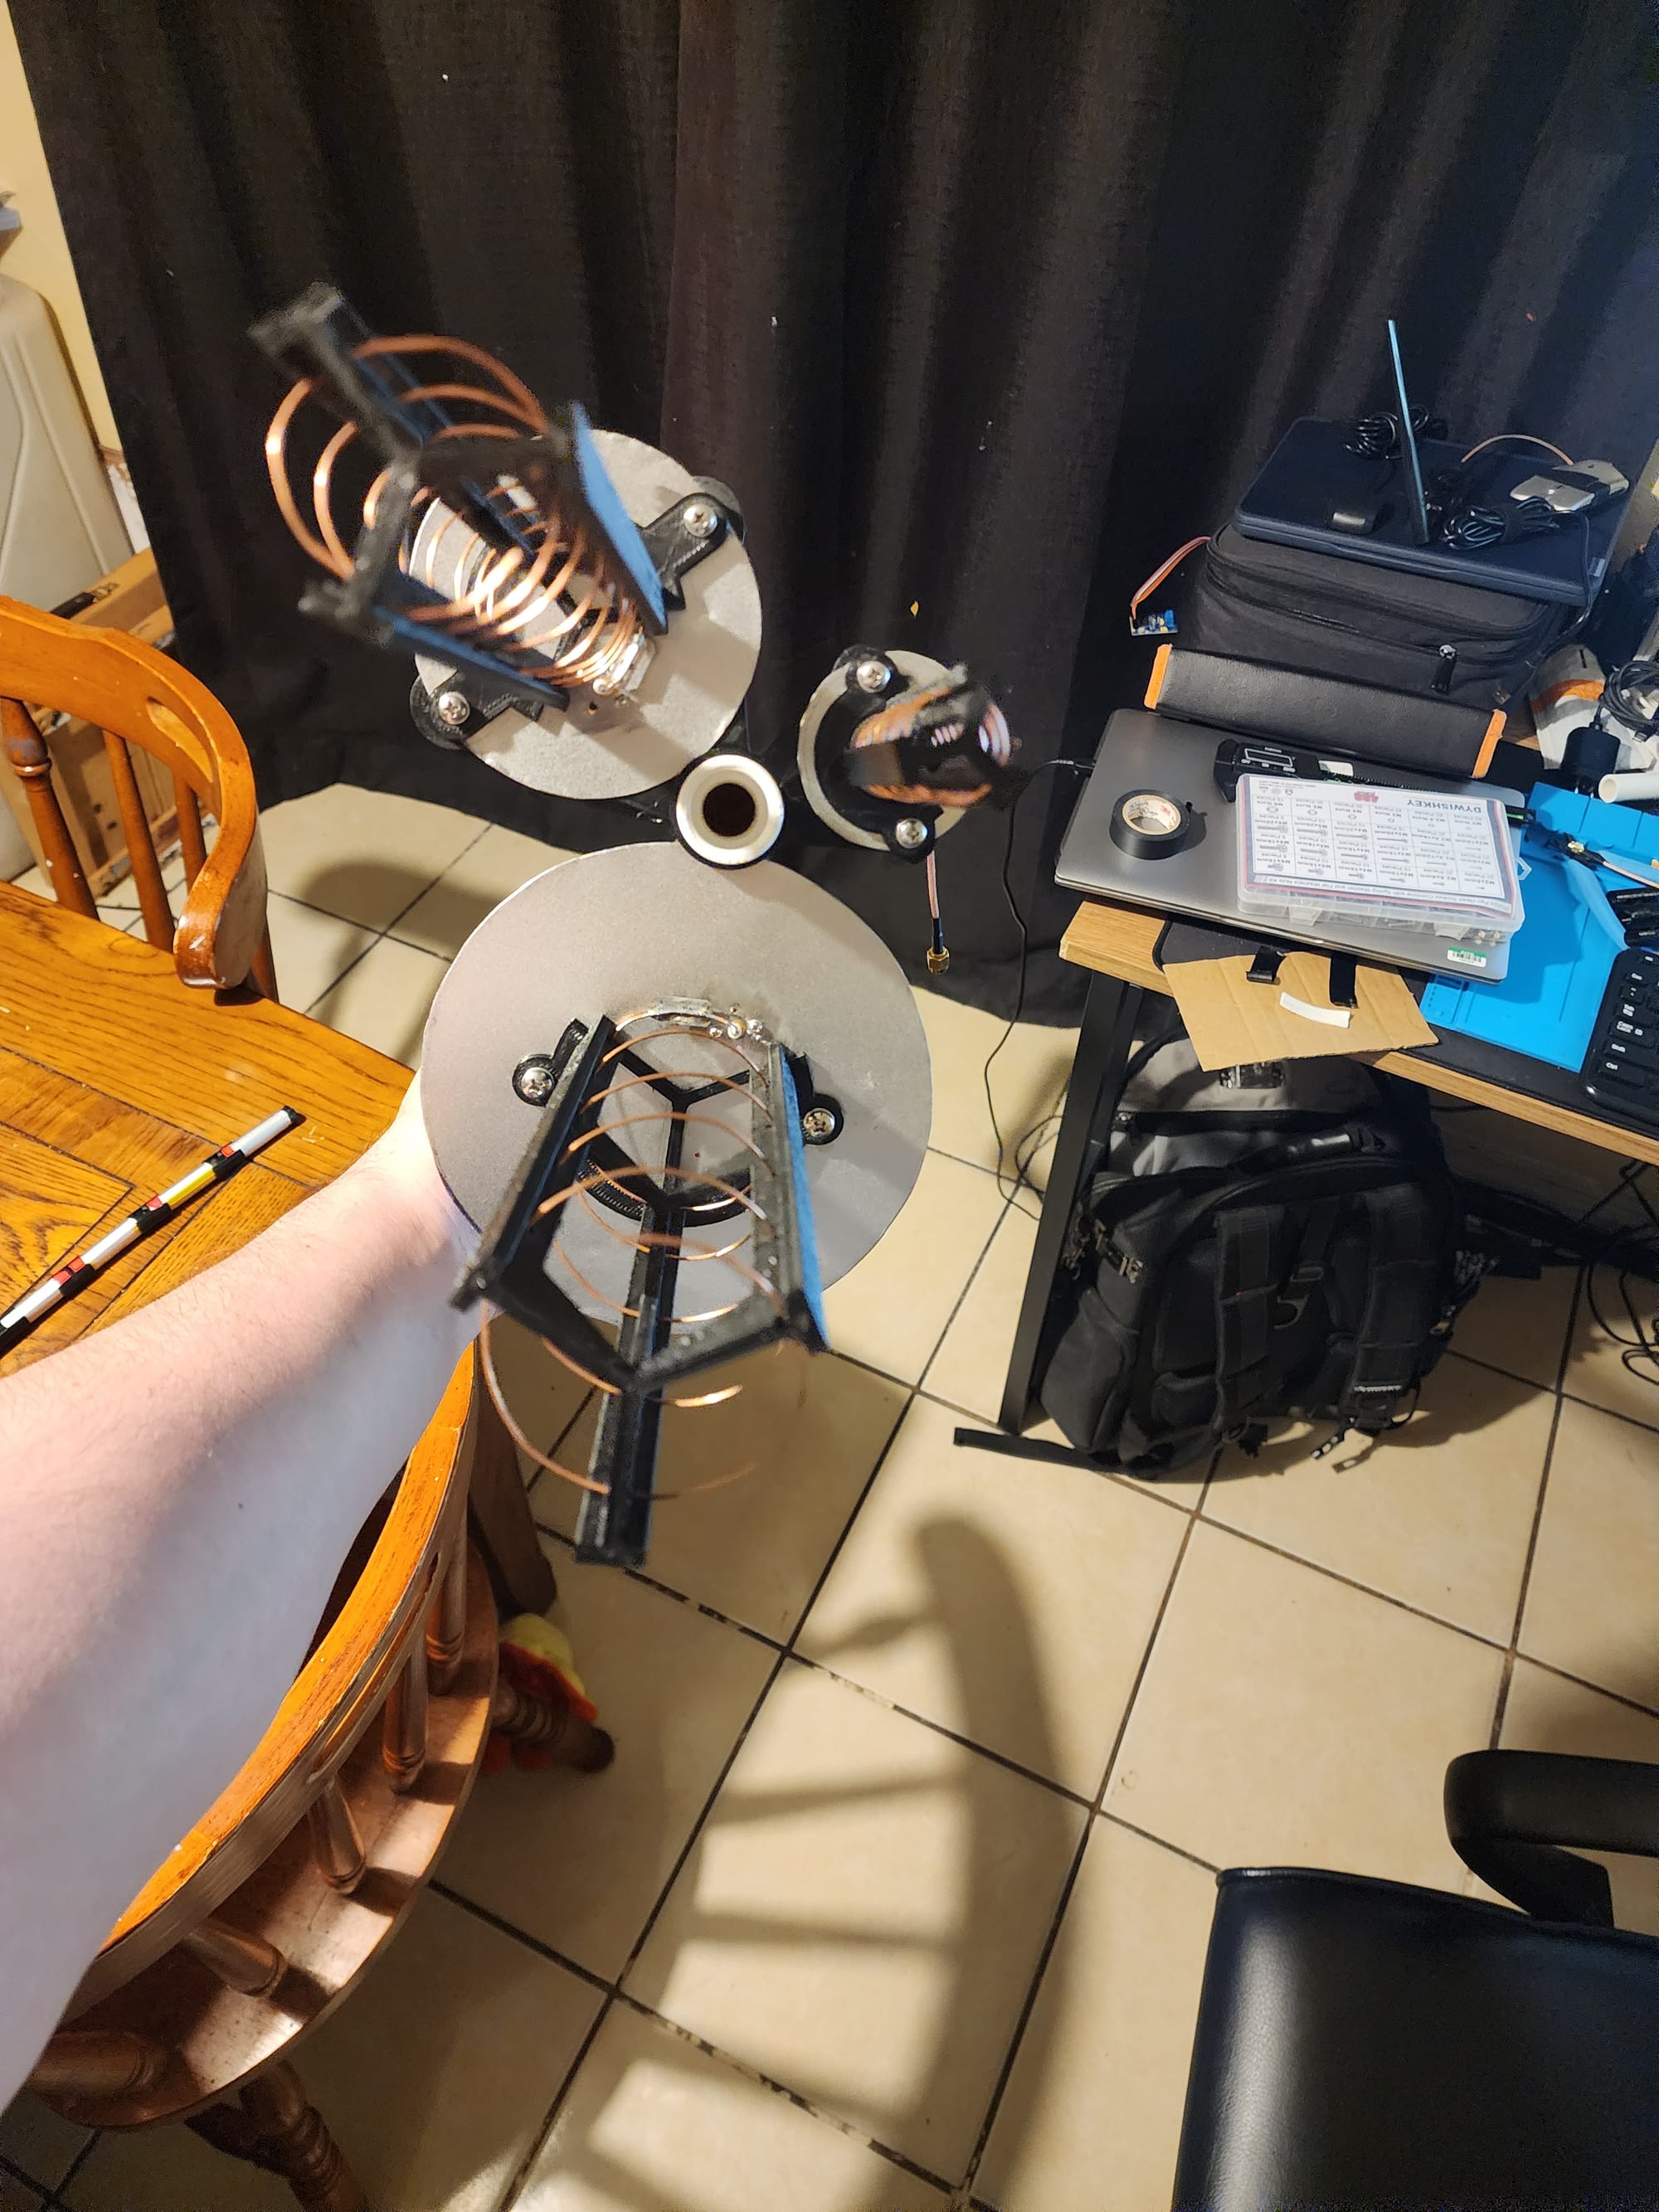
Once the other antennas were complete, I wanted to test the radiation pattern to ensure I built these correctly to operate in axial mode (radiation pattern mostly forward). I would have liked to do this using a spectrum analyzer, but I do have a HackRF that can operate at these frequencies, so I used that.
I set up the antennas on a stand outside in an open area to avoid reflections off of nearby surfaces. I stood in front of the antenna where I expected the radiation pattern to be the strongest about 10ft away and measured the background noise at that frequency. Then I turned on the components, amplifier, and antenna and monitored the spike in the at the target frequency.
I then walked around the antenna, keeping the same distance from it and continued monitoring the signal on the HackRF. This was probably the best moment in this whole build to see the signal begin to drop off and nearly disappear once I was about 30 -35 degrees from the center axis of the antenna. I did notice some spikes near the back of the antenna (back lobe) which was expected with this type of antenna.
I repeated this process moving another 10ft away at a time, pretty much getting the same result (shape of radiation pattern) as I went along. I wish I had a drone to take an arial photo of where I tested this to match up the signal strengths to get a better idea of the radiation pattern, something I want to do in the future, but this worked well enough for me now confirming the antennas were working as designed.
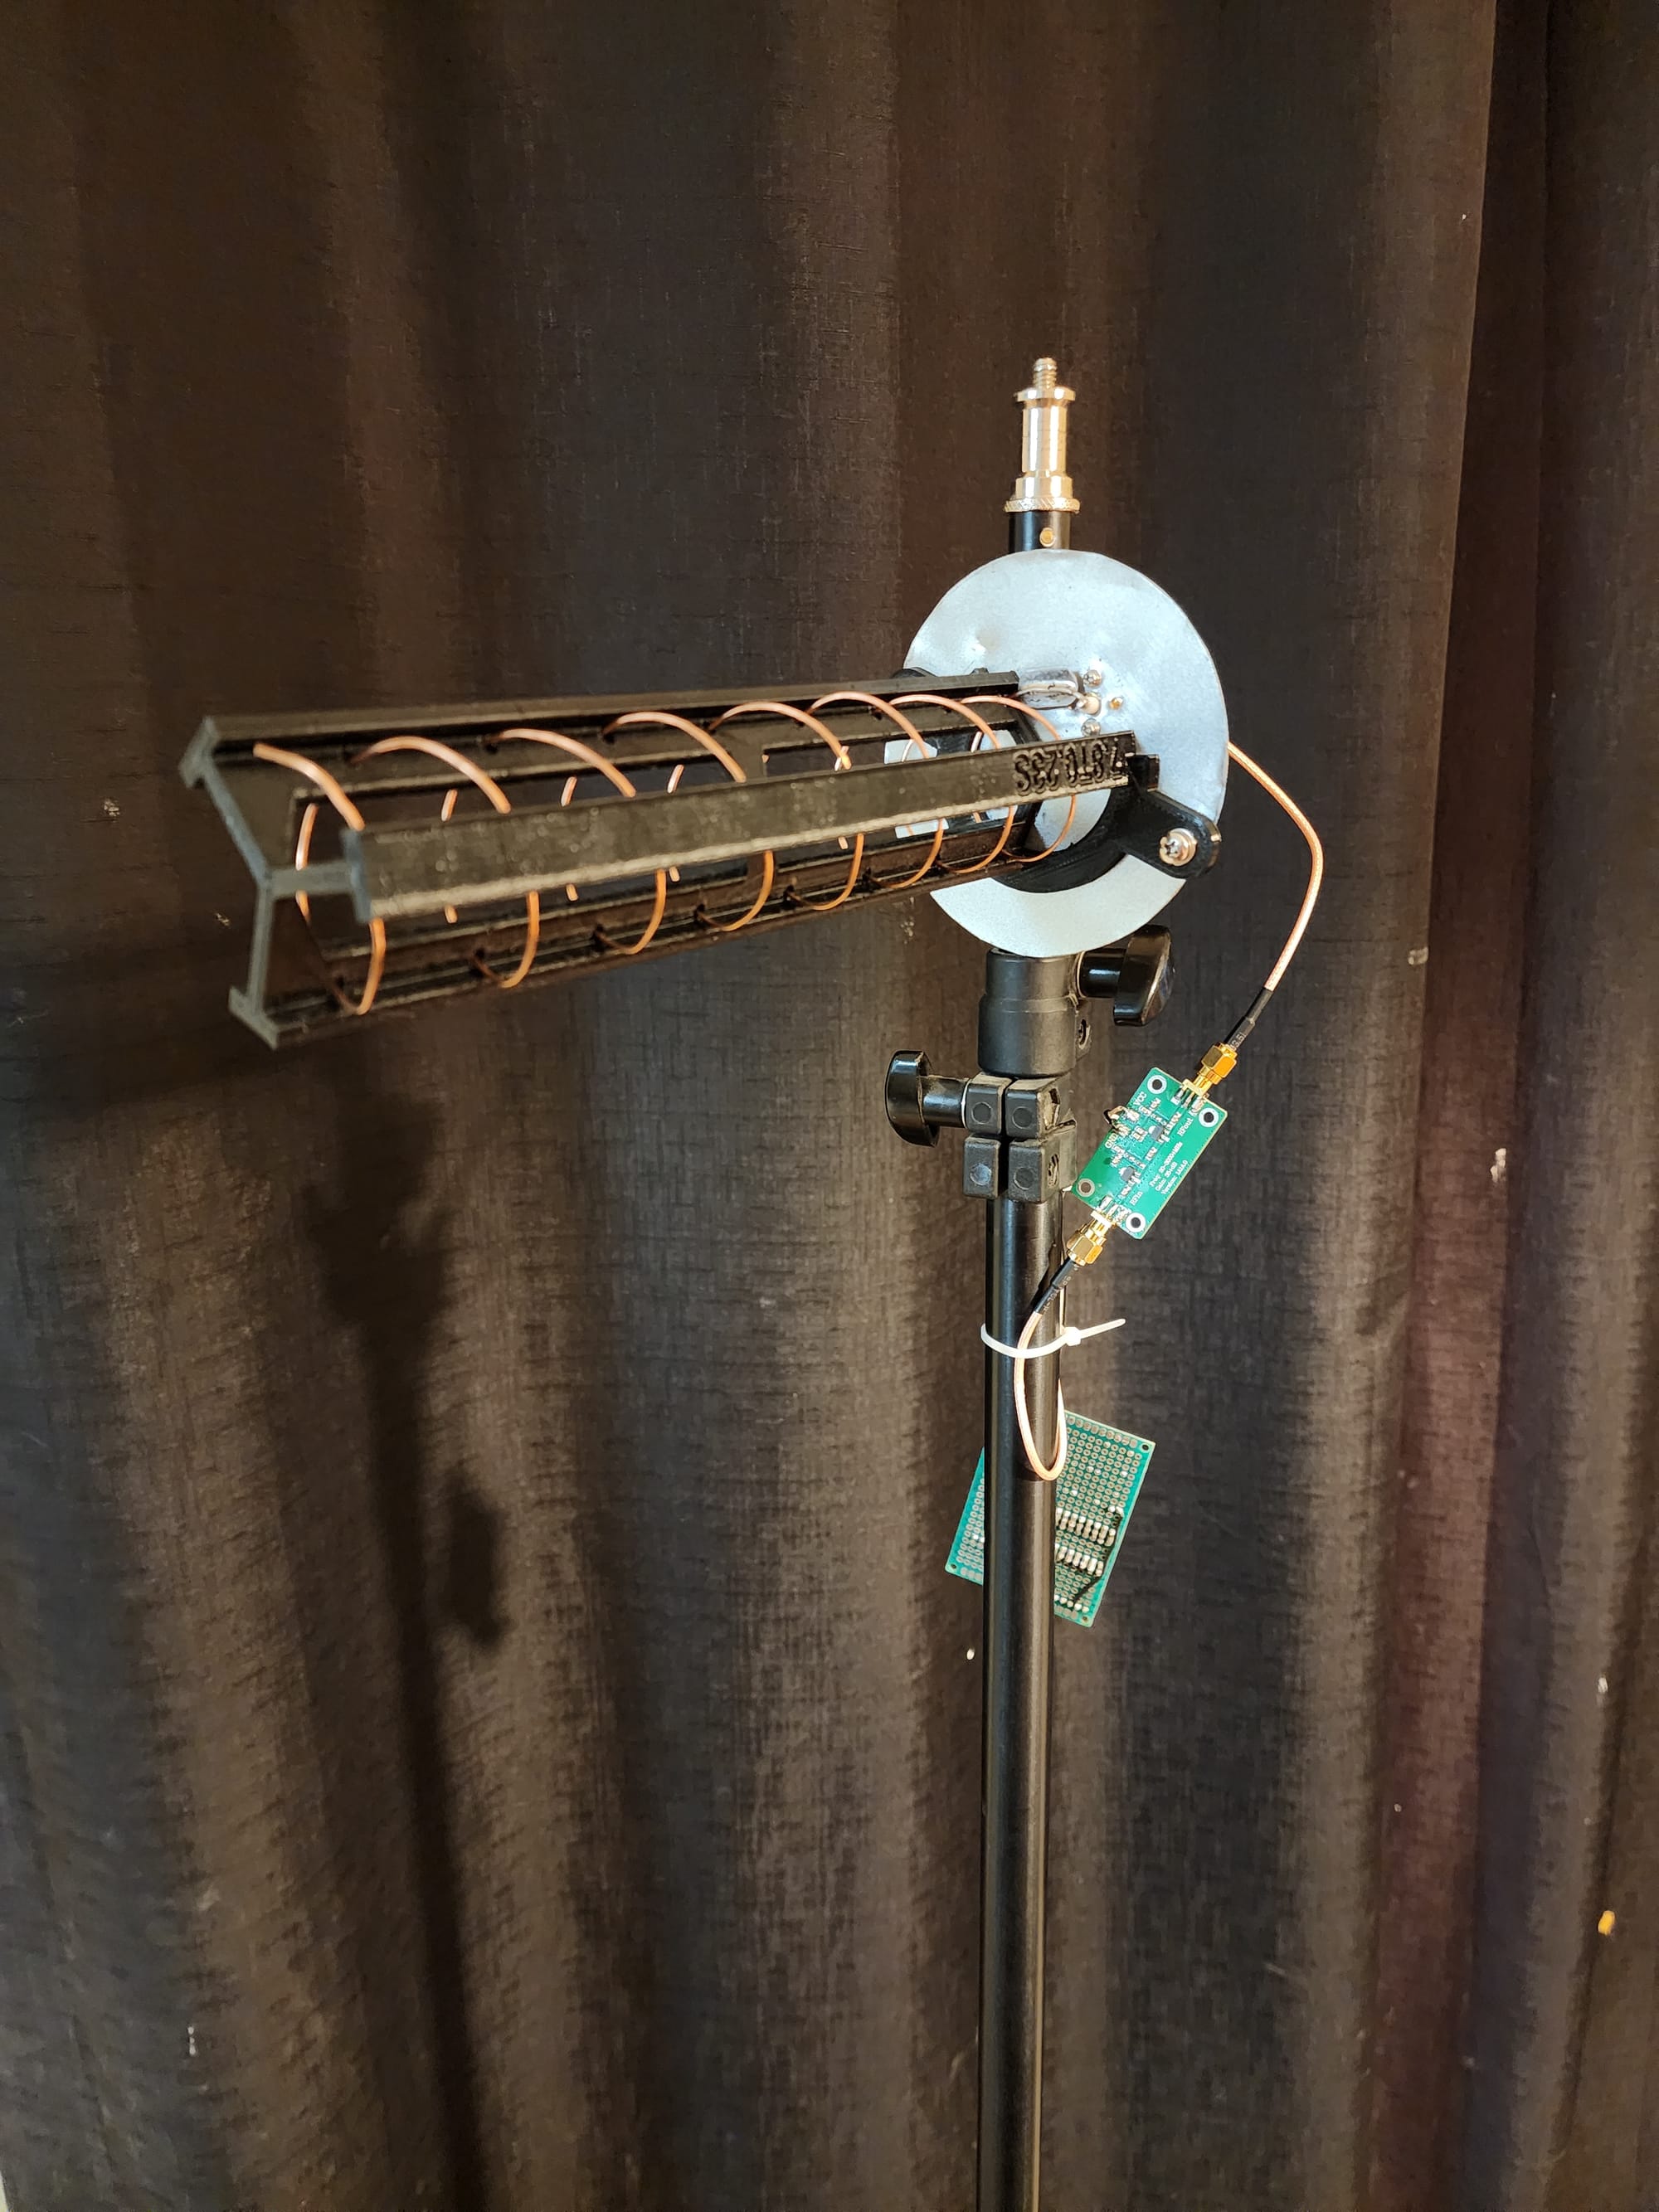
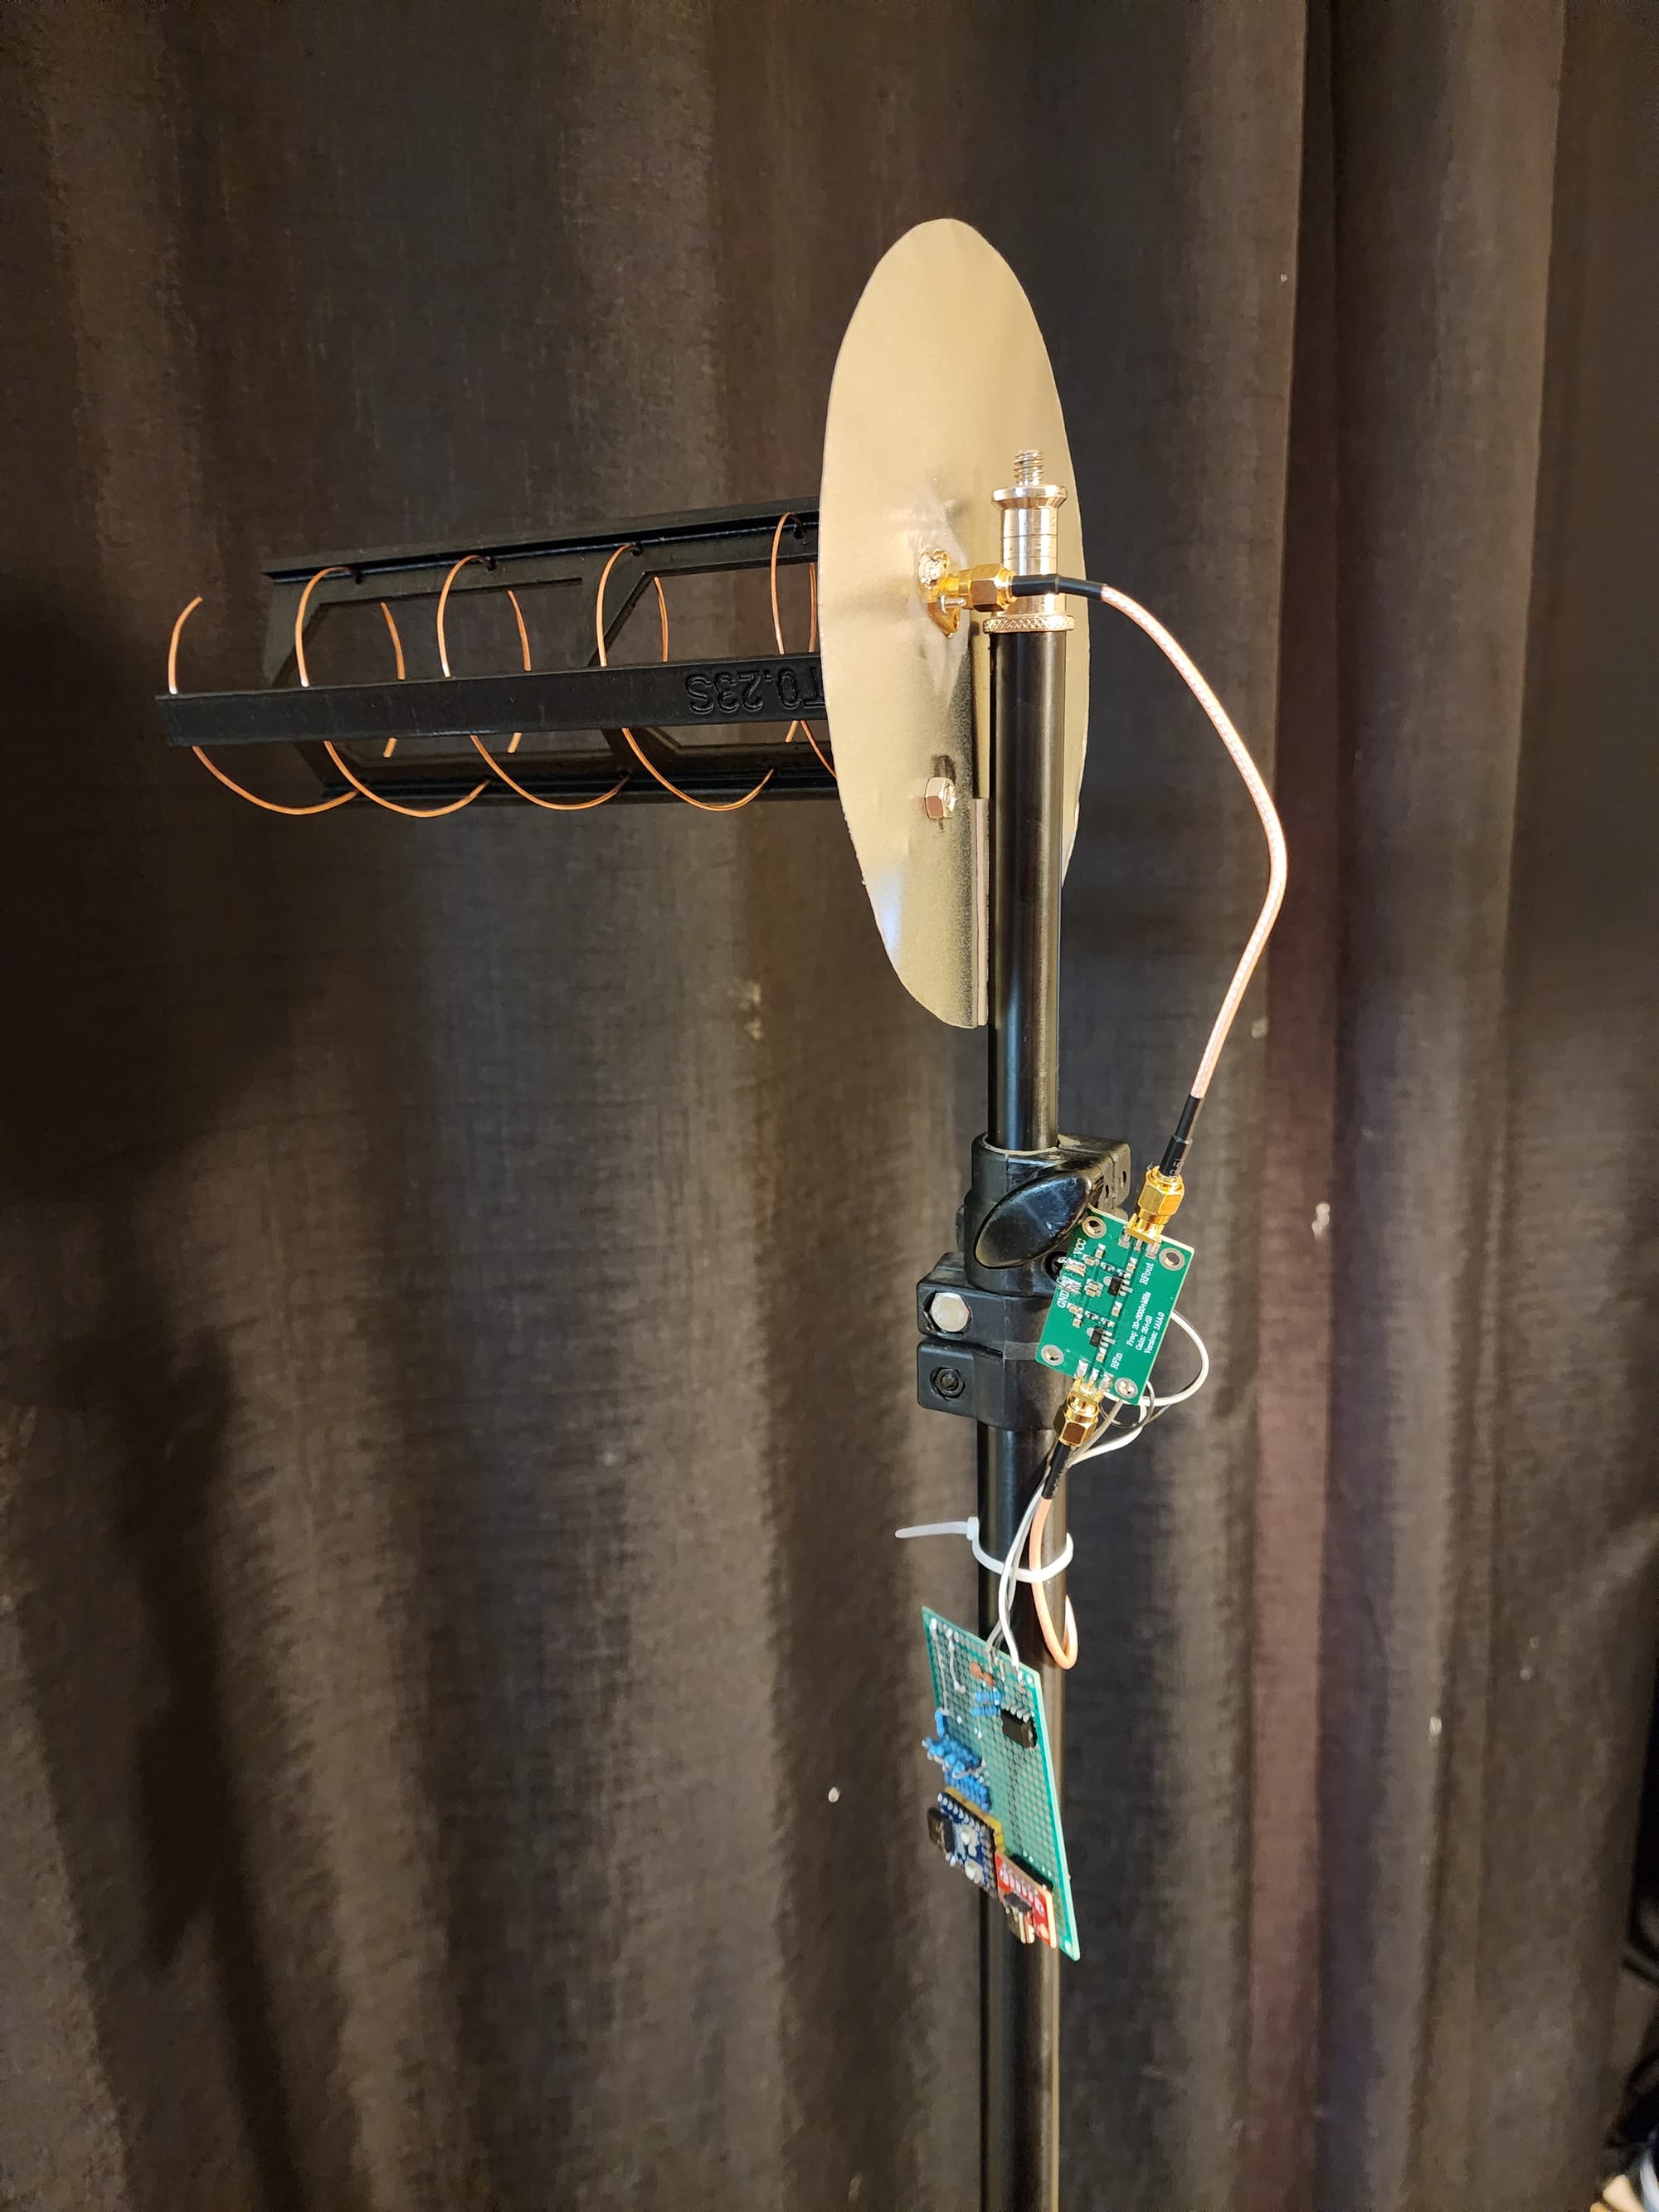
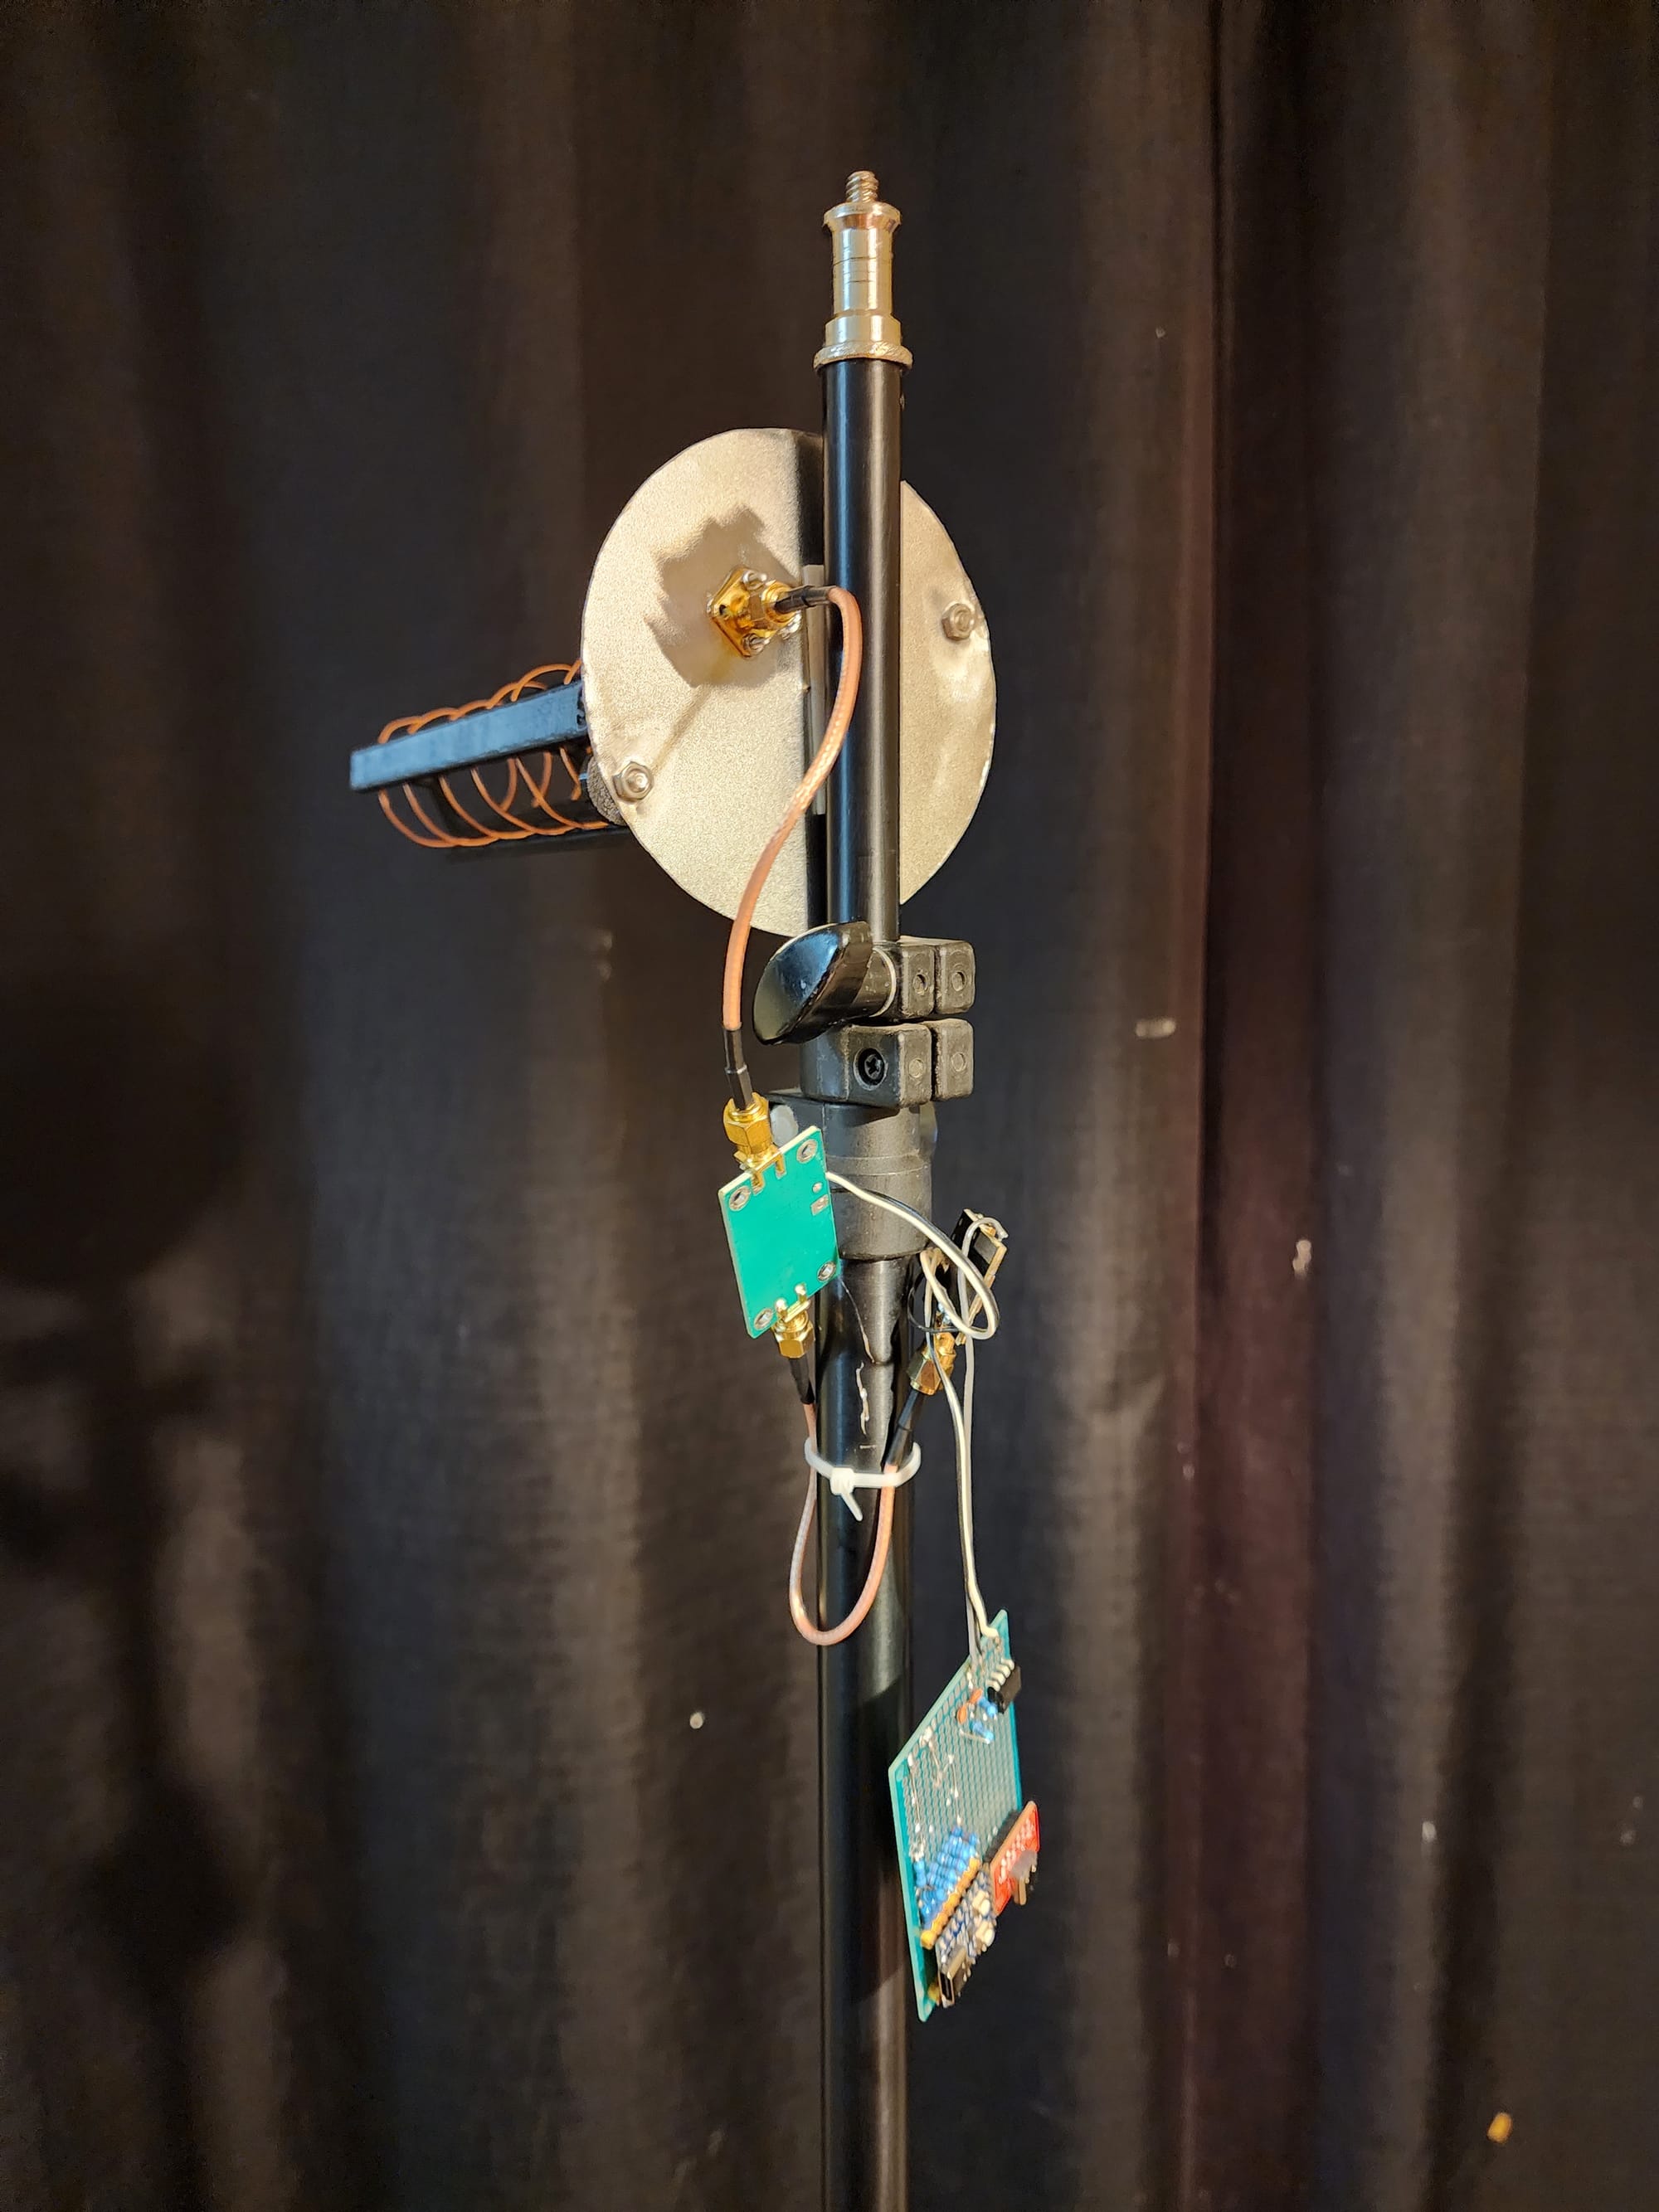
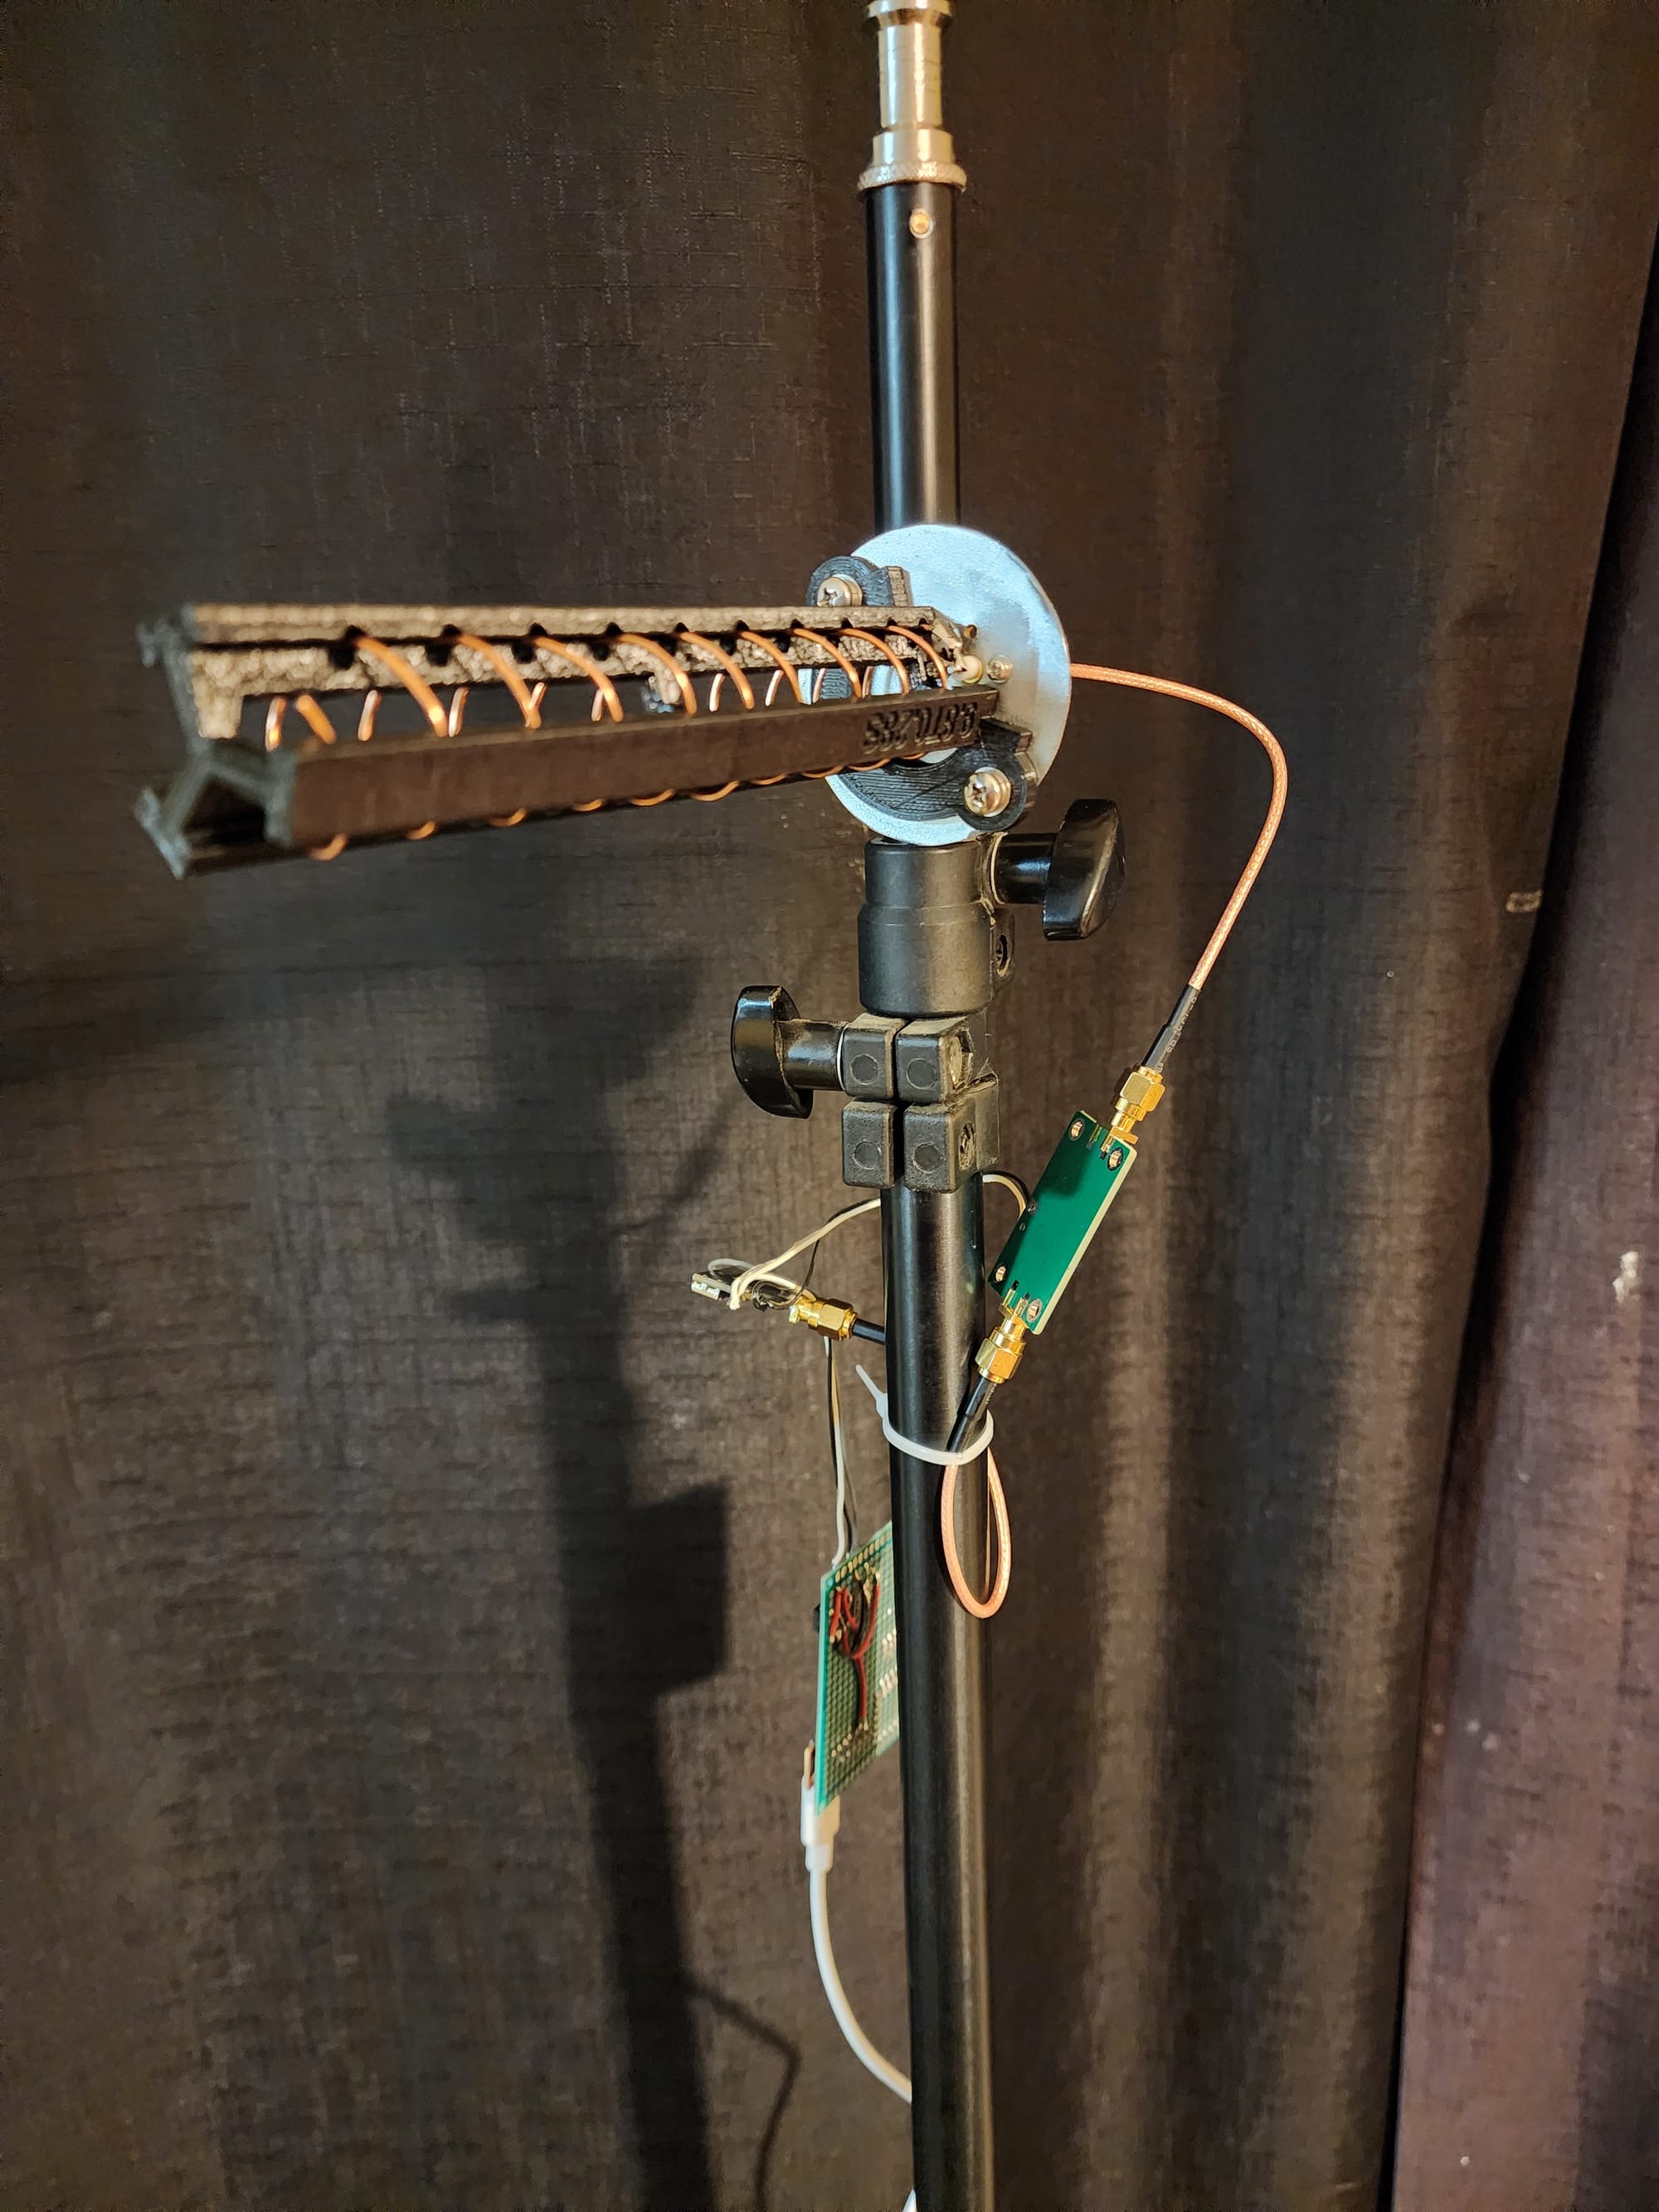
Setup for testing radiation pattern
Powering the Jammer
In my End of the year Wrap-up blog post I mentioned I was saving the batteries from “disposable” vapes. and I have a pretty good collection from friends and family that use these. I had enough in fact, to wire up three separate packs in order to individually power each set of components and amplifiers for a given frequency. This way I would be able to turn on and off the jamming signal for each frequency without effecting the others.
Building battery packs
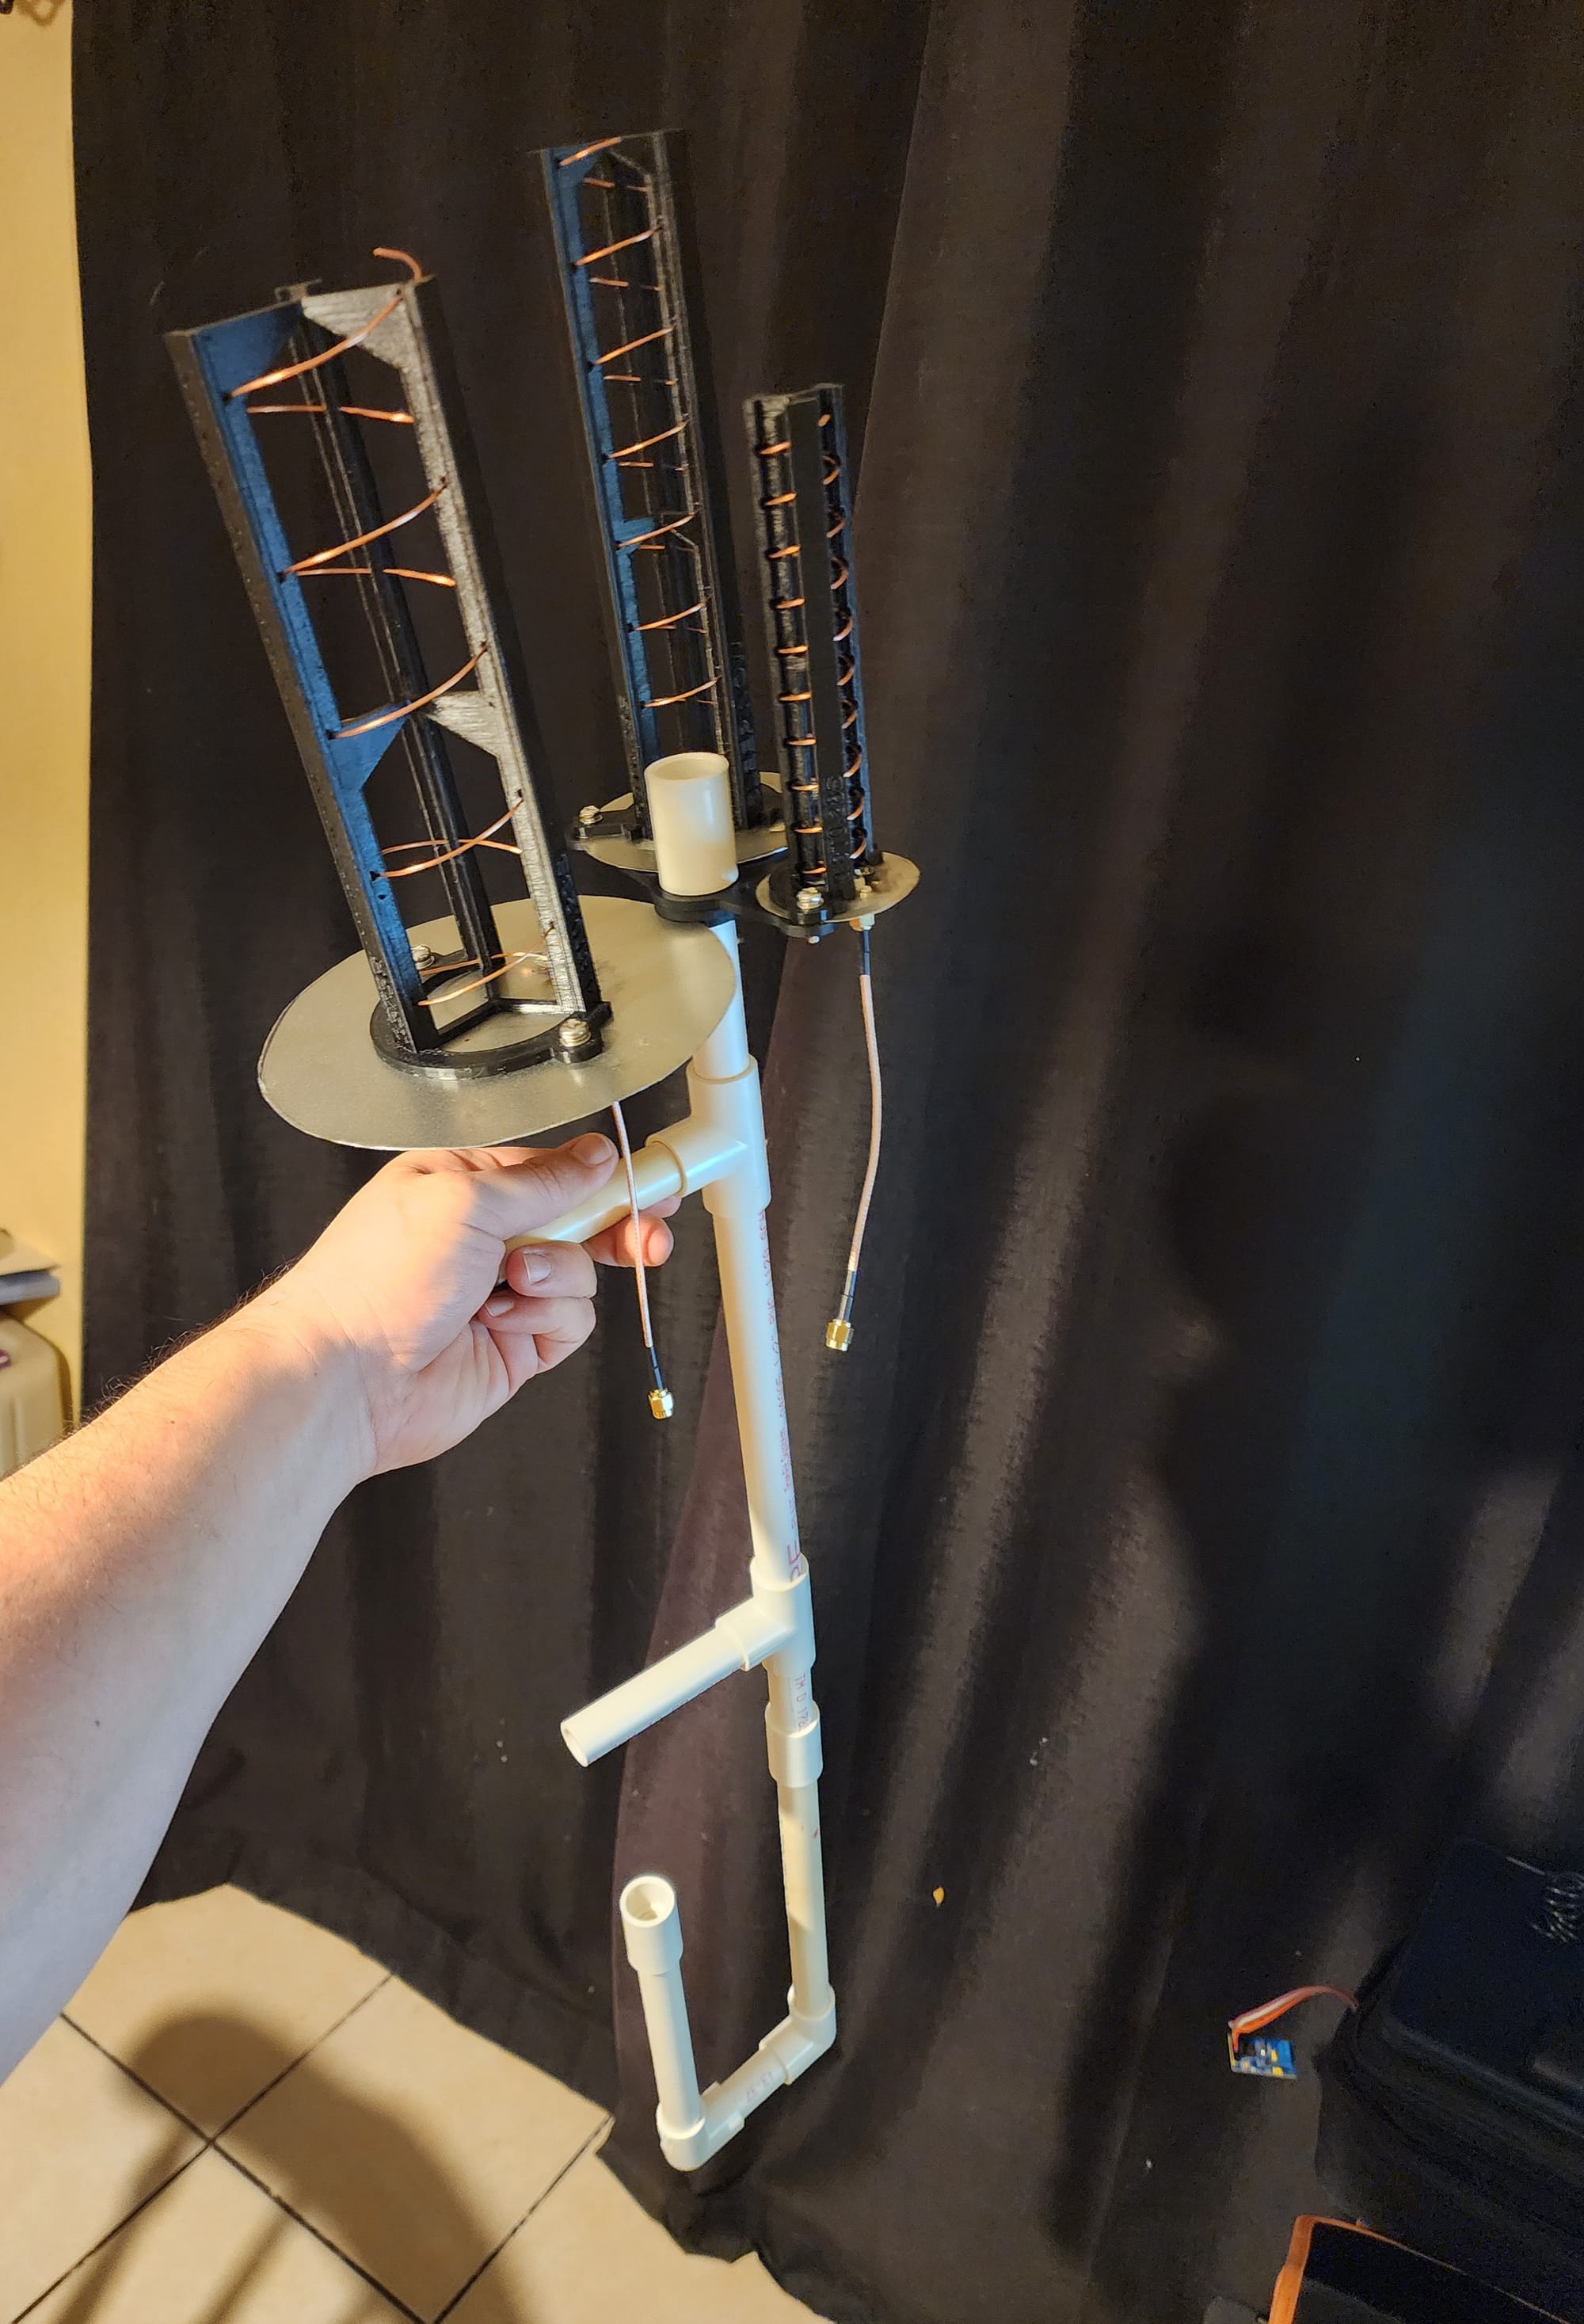
Let's Put It All Together
This was probably the funniest part of the whole build as during the whole project, I kept thinking of different ways to build a frame, from 3d printing, to making one out wood, or even buying a cheap toy rifle or dart gun and using that somehow. I never decided or moved forward with any of these choices and the night I completed the battery packs and completed the final tests, I had no frame to put it all on haha.
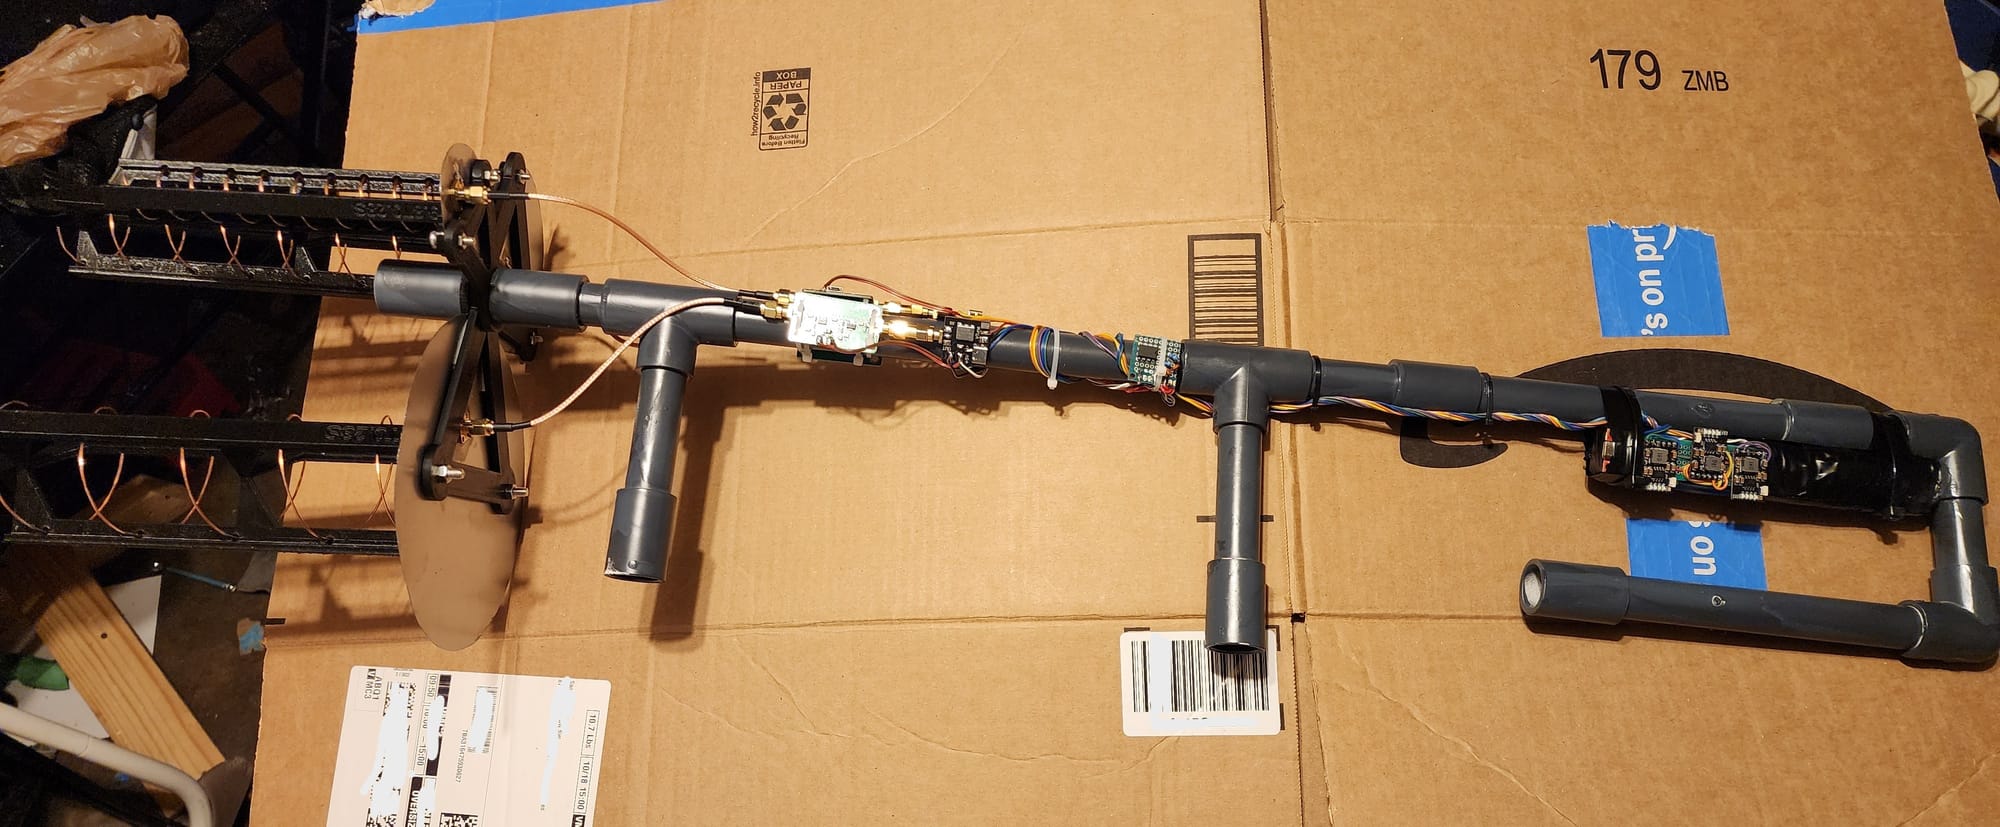
I was so excited to get everything put together, so I looked around the garage and found some PVC pipe fittings and a few spare pipes. The design almost miraculously came together. I quickly designed some mounting brackets for each antenna in Tinkercad and printed them while I assembled everything else. The brackets bolted to the antenna then slid right onto the center pipe on the frame. This will allow me to adjust, add, or remove antenna quickly and easily.
Everything else I pretty much used electrical tape and zip ties to mount onto the frame.

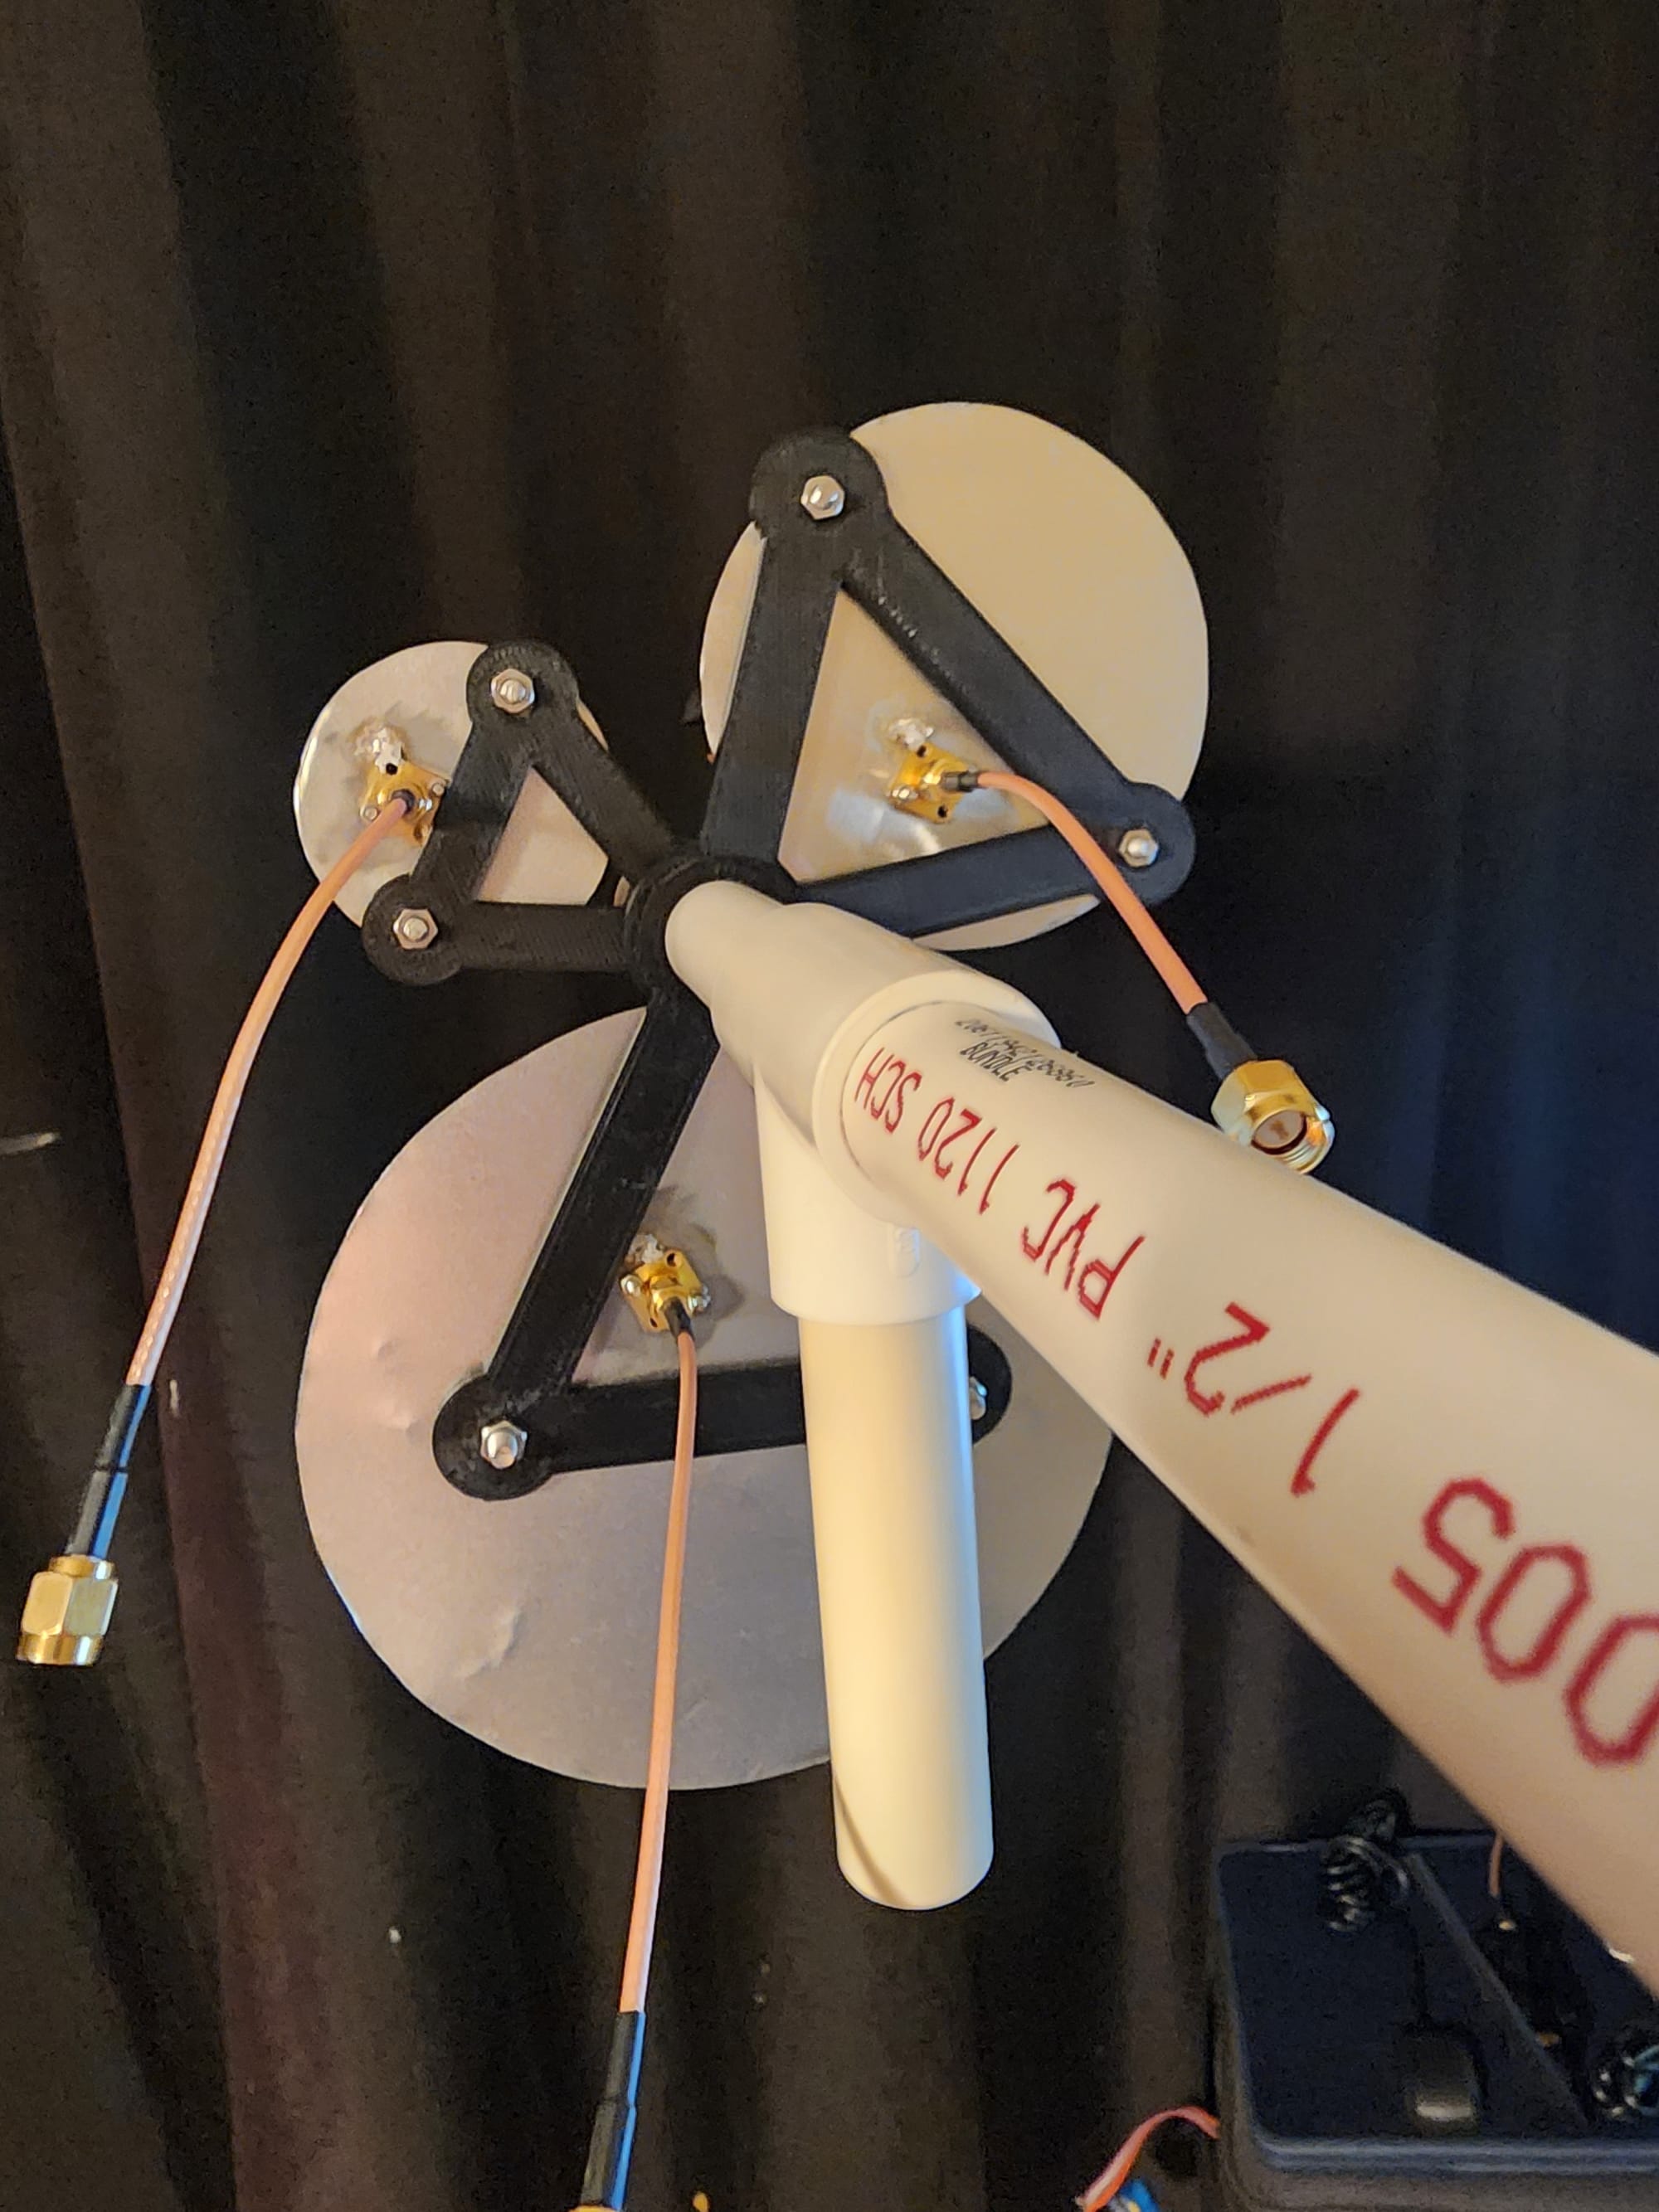
Putting it all together

Project Summary
The noise levels are pretty significant when read through the HackRF or other SDR. The Jammer will disconnect devices (laptops and phones) from 2.4GHz and 5GHz Wi-Fi as well as cause the phone to lose GPS signal from a pretty significant distance. I do want to replace the amplifiers I used with some better ones I purchased that will greatly improve the output power.
There are some other things I'd like to improve, like the noise circuit. For now, it works great how I have it built and wired but I'd like to build a seperate circuit for each frequency that is tuned to the respective components. I still need to build the other antennas and circuits for jamming the other GPS and control frequencies so I can easily swap them out. Also a more robust frame to house everything on would be great once these other things have been built and tested.
This would also be a great project to finally try my hand at PCB design and manufacture so I could condense each frequency's components to one or two modules that can be swapped out more easily.
I also want to build a FPV drone myself for testing different receivers and protocols, but for right now I'm holding off until I can comfortably afford to get into that hobby.
Project Takeaways
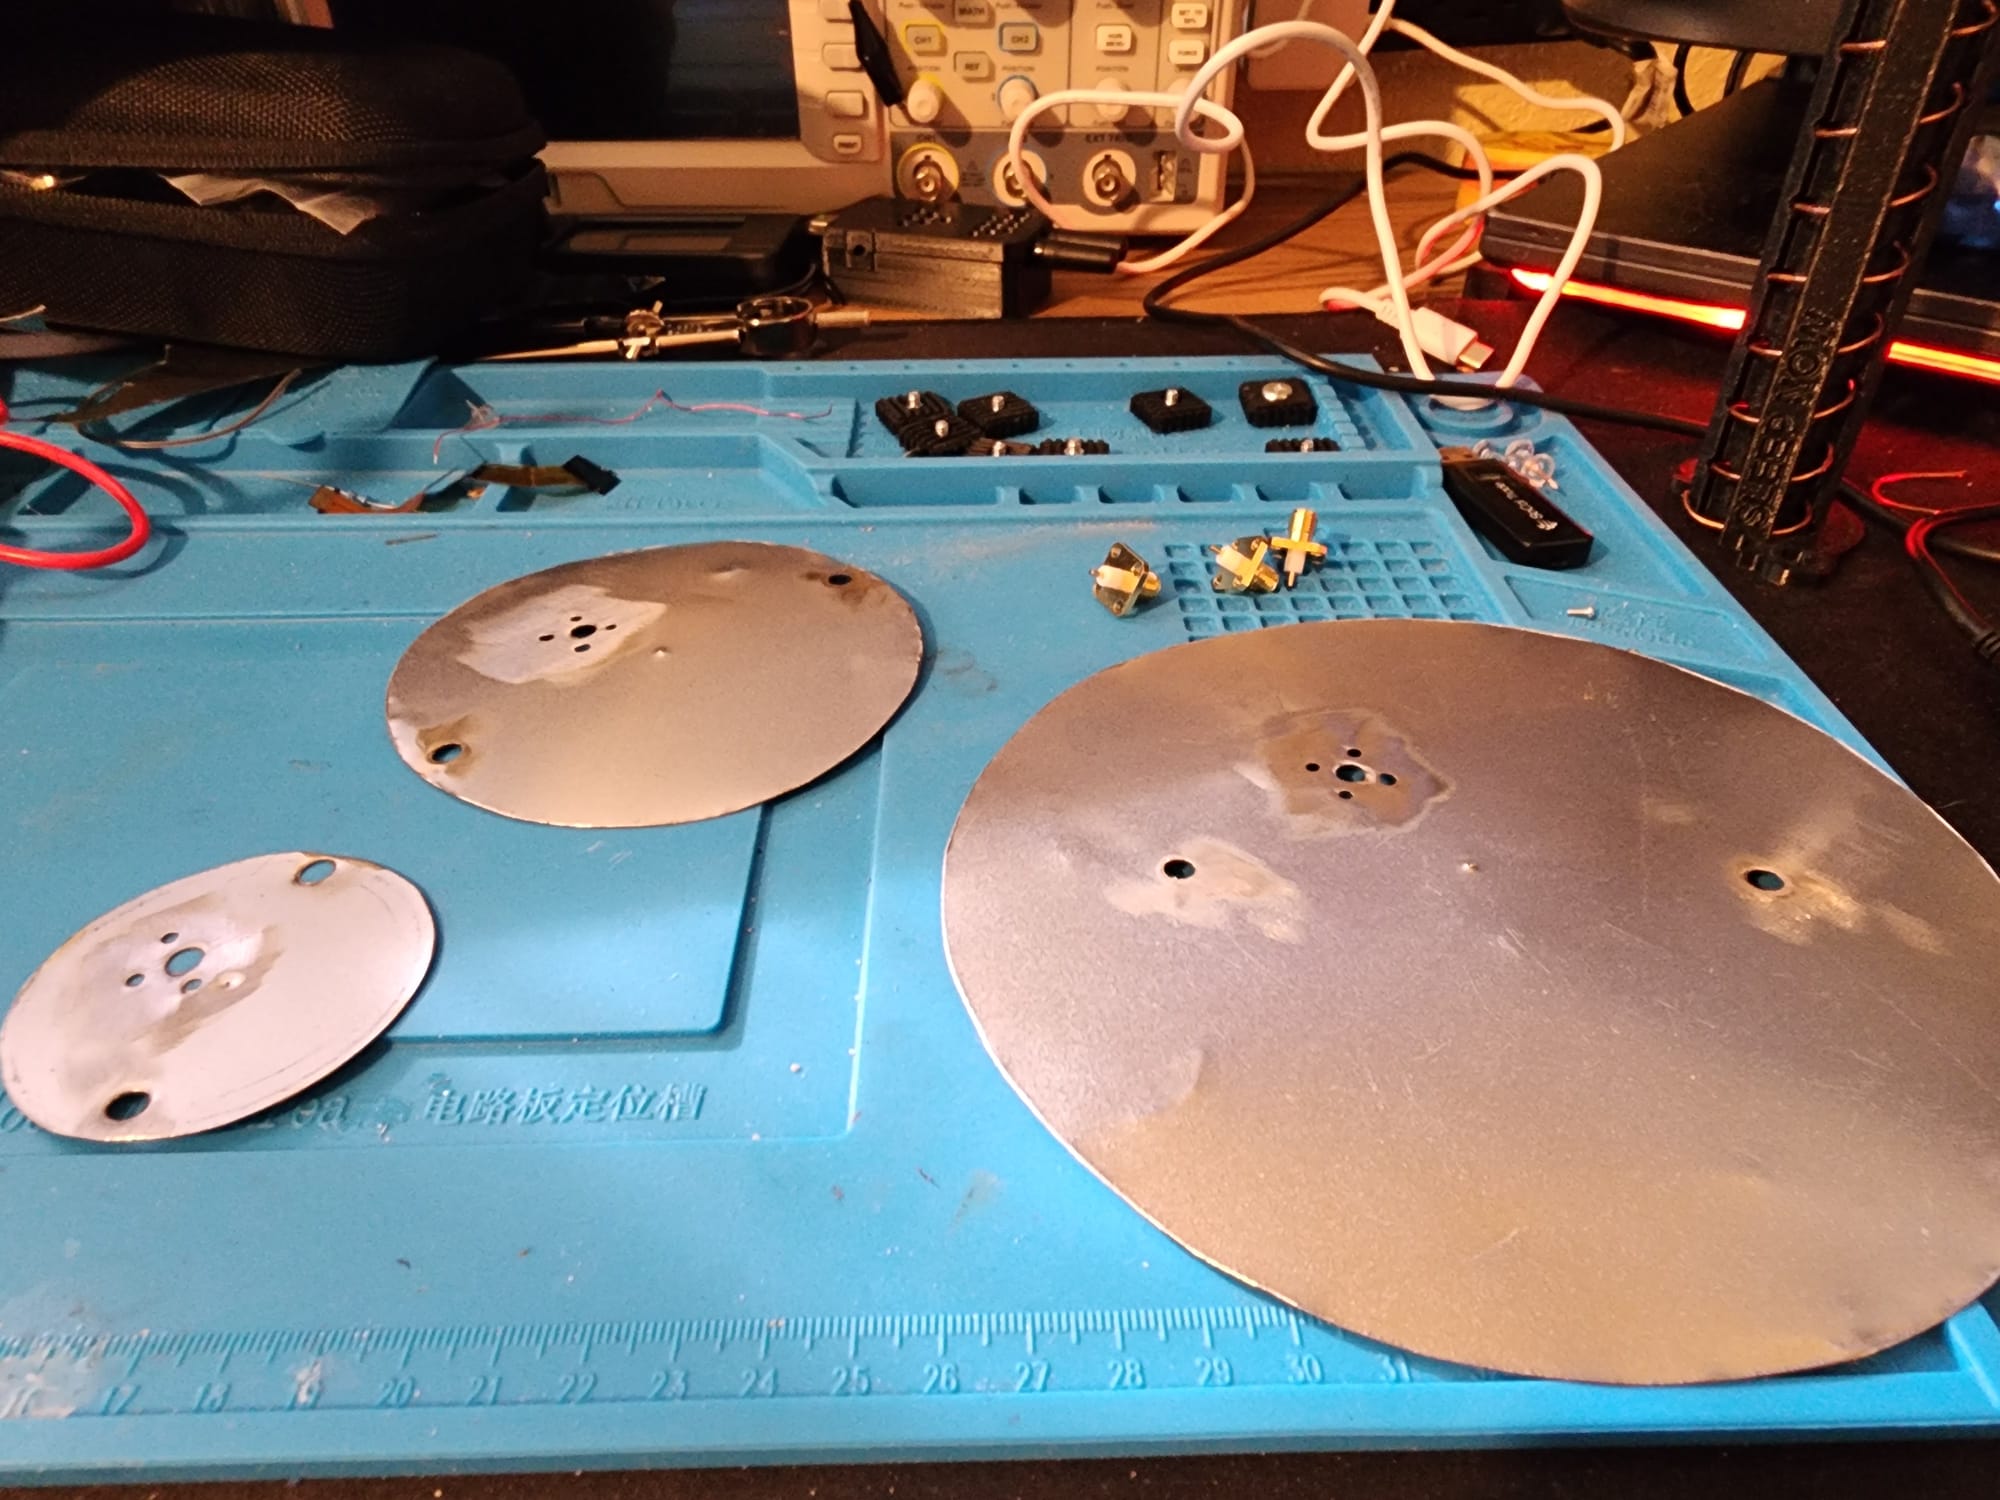
All in all, I built this device for under $30 in parts from AliExpress. I printed the antenna scaffolds and mounts myself, used old copper wire for the helix conductor, dollar store pizza pans for the reflector plates, used free batteries I had collected from thrown away vapes, and built the frame out of old PVC pipe and fittings.
The low cost of this device causes me to worry, as anyone could build a significantly higher-powered device for not a whole lot more money that is designed for cell phone frequencies, is omni-directional, and would cover a large area to disrupt or disable cell phone communications. You could also build one for Wi-Fi frequencies to take out devices like security cameras in homes or businesses. With these concepts you could wreak a lot of havoc or you could have a better understanding of how these things work so they can be mitigated or tracked down.
I learned a lot while working on this project and I am happy with the questions I answered and even more so with the many more questions and rabbit holes this has opened up for me. This project solidified my understanding of wave propagation and antenna design while allowing me to solve a problem I have been having with another project I am currently working on (Can't wait until this one is finished!).
With all my projects, I enjoy the research, the planning, and the final stages of putting everything together into a finished product for testing and adjusting. The knowledge gained during these processes continues to surprise me and I look forward to it every time.
Thank you for taking the time to read this post, I hope you have a great 2025!